When I first started filling cracks and voids in my turned bowls and other pieces I would just pack the hole, crack or area with sawdust, maybe shavings or finely ground coffee grounds. Then I would apply some CA, depending on the situation I would use thin CA most of the time and medium CA with bigger holes and thick for really big stuff. But I think CA isn’t the answer for big cracks, deformities or holes.
Mica Powdered Color in Oak Burl small bowl
Looking around I found some of the epoxies work great and in a similar manner as CA. I think the epoxy acts more as an agent of keeping the piece together than the CA, however I have no proof of that.
Which Epoxy Do You Use For Woodturning?
Ultimately it depends on the purpose of the filling, is it just for aesthetics or is it functional. That is, do you need to hold the piece together to keep it from falling apart while it is being turned or is it just part of the finished project and is used to make it look good.
There are a variety of Epoxies you can use for woodturning. You have the 5 minute epoxies that will set up in 5 minutes which is usually what I use. You can also find the same type of epoxy in a 30 minute set up time (this would call for Devcon 30 minute epoxy) if you need the time to mix and apply, sometimes build dams or whatever is needed to keep the epoxy in place. I prefer the 5 minute epoxy for most projects.
Mica Epoxy Coloring Powder
One cool effect you can add to your projects is adding some color to your projects problem areas such as cracks, holes and checks. Basically you mix up a little epoxy for the knot hole your are filling in and add a pinch of Mica Powered Color ….its an irridesence type color and can make or break you project.
Colored River Tables or Colored Wood Bowls!
You’ve probably have seen the ‘river tables’ which are two pieces of thick log slabs joined together with areas in the middle and sometimes outside filled with colored epoxy resin. We are doing basically the same but with very small amounts to give accent to a piece or to help it hold together and although bigger holes and problem areas are filled with epoxy and mica powdered color, you can use the color with your CA application and achieve similar results.
Remember there are a variety of dyes you can use with epoxy or CA. I like the irridesence powderred mica type which is Mica but the othe type is a dye that provides a solid color ….which could have its place depending what type of project you are turning.
Epoxy Resin Turning
In this article I am really only talking about patching, filling and repairing. I turn a lot of bowls so my choice is to have a defect become a point of interest in the piece and/or I can fill that area with some epoxy resin and color.
Others have taken the resin and epoxy turning to the extreme. A mold is formed and a piece of wood is placed in the mold and then covered up by epoxy resin which is sometimes colored or clear. Beautiful pieces are turned from such efforts but this involves a whole new skill set. However, keep in mind the Mica Colored additive is translucent and enhances the look of the wood and the resin.
I haven’t done much casting but I can tell you it takes woodturning to a whole new level!
Source of Mica Powder
I’ve tried a couple different sources of Mica type coloring. Even in our facebook group I found there to a lack of good cheap source of the translucent Mica coloring powder that I could use for turning wood.
I really wanted to write this just to share my new source of Mica Powder for coloring epoxy resins in a translucent color. It’s cheap …..25 colors to help you get started and the perfect way to play around with turning wood with epoxy resin or CA that is colored. I thought this was a great value and it is described as:
Make Your Own Woodturning Tool Sharpening System Modeled After the Oneway Sharpening System
I thought I write this article about making your own sharpening system for woodturning tools because I know many new woodturnings cannot afford to go out and buy a sharpening system like the Wolverine Oneway sharpening system. It’s gonna cost you between $100 and $150 to purchase the system and you just don’t have the case. So, there are solutions and there are plans and videos that will show you how to make a sharpening system for your woodturnig tools that is similiar to the Oneway sharpening system and I thought I would put together some videos and pdf’s to help you ….then, I think I am going to set up one of these systems on an old water wheel grind I have.
I have the Wolverine Oneway sharpening jig and although its taken me some time to perfect my sharpening technique, I love this woodturning tool sharpening system.
I have my wolverine sharpening system set up on one grinder but I thought I would like to make a dedicated grinder out of an old harbor freight wet wheel grinder that is kind of a Tormek take off. The benefit is that the wet wheel turns very slow and will take off very little steel when sharpening your woodturning tools.
Using oneway type sharpening system on a Harbor Freight Wet wheel
I really didn’t want to buy another Wolverine Sharpening System ….although I would in a second if I had the cash but I don’t….. so I thought I would try making a system and tool holder since I’ve watched a handful of videos on guys making a sharpening system that essentially is a take off or duplicate of the Oneway sharpening system but made of wood ….and in some cases steel ….but, I’m going to make mine of wood.
Make Your Own
Woodturning Sharpening Tools
I have to admit, I almost enjoy making the different tools and jigs for my woodturning habit as much as I like turning wood. There is something so very satisfying in making your own wooddturing tools and jigs….at least for me.
Cap’n Eddie video on making a duplicate of the vari-grind jig was one of the first videos I was exposed to for making your own sharpening tools. He has some great videos on making the holder, the varigrind and how to use it. He also sells the components on his website for making the system yourself ….at least he did ….I’ll have to go back and see if I can dig up some of those old videos he did. Note to self, look up Eddie Castelin’s sharpening videos 🙂 You can see Capn’ Eddie’s $2 Dollar Sharpening Jig ….click on the link 🙂
Al Furtado also did at least one video on how to make a Oneway copy ….or he might have called it an Ellsworth tool or tool for grinding an Ellsworth grind …..I’ll dig up that video or post also https://youtu.be/j9Cm8kjfsVQ
New Video On Making Your
Own Oneway Sharpening Jig
One of the first things I think you should do is watch Doug Thompsons video on sharpening your woodturing tools https://youtu.be/ttYyulsM7wg
this will give you an idea of what sharpening is all about and might help you if you have problems sharpening your woodturning tools.
Make a Wood Turning/Grinder
Sharpening Jig for $12!
Here’s a video on making the sharpening jig from plywood, no need to know how to weld or work with metal ….his name is Paul Jenkins and I believe that is his youtube channel also. He walks you through a simple build for a sharpening jig base and explains the how’s and why’s ….I thought it was a pretty good video https://youtu.be/Ws_JoC4BXOQ
Here is a link to a pdf for dimensions and instructions http://stwt.org/pdf/king%20heiple%20sharp%20jig.pdf I will also put this in the “File” section of our facebook group at Wood Turng Basics. He shows a very basic but functional vari-grind jig for holding your woodturing tools.http://stwt.org/pdf/king%20heiple%20sharp%20jig.pdf
Watch this young man make a very simple version of the Wolverine Sharpening System. It’s super simple and although it is probably focuses on sharpening simple roughing gouges and parting tools ….if you use your imagination you can see how you can use it with the vari-grind tool to sharpen your bowl gouges. https://youtu.be/Ph0EwjQrurY
Copy of Vari-grind Jig
Both Cap’n Eddie and Al Furtado show us how to build a tool similar to the varigrind for next to nothing. It can work with the platform in the above paragraph.
Marius Hornbuerger shows us how to make a really nice version of the vari-grind tool holder by video https://youtu.be/sfmIv0iXjis
and also gives us a copy of of the plans he uses, actually templates that you glue to your plywood and cut out…..doesn’t get much simpler.
This guy basically copied Capn’ Eddies Ellsworth Sharpening Jig and he does give Capn’ Eddie credit in his description but it is a decent video and shows you how to make the vari-grind type jig so you can sharpen your bowl gouges https://youtu.be/ir2hlwVr84M
Make your own woodturning tool sharpening system and jig
and he has some decent tutorials with pictures at https://www.instructables.com/id/Sharpening-Jig-for-Woodturning-Gouges/
How To Sharpen a Turning Tool
Without a Grinder
Maybe you don’t have a grinder or you’re just hard core and want to keep things really simple here’s a quick lesson on sharpening without a grinder ….how to use some diamond sharpeners by hand to keep an edge on your tools. Its a little hard core for me but he does explain the basics of sharpening which can be applied to just about any type of sharpening when it comes to sharpening your woodturning tools or any woodworking tools https://youtu.be/9kkI7iHL-Nc
Wolverine Oneway Sharpening
System Setup Guides
Below you’ll find the pdf setup guides for the Oneway sharpening jig that come with the package. You’ll find these useful when trying to understand the theory and application for sharpening your woodturning tools.
Cutting Up and Using a Hollow Log For Woodturning Projects
As a woodturner I’m always looking for new sources of wood for woodturning as well as new ways to turn pieces of wood or logs that one might think is better suited for the burn pile!
I hear chainsaws running in the neighborhood, I hear wood chippers chopping up branches and it drives me crazy if I can’t get there to see what type of wood I might be able to snag. I see trees that are being taken down or are down laying along side the road and I want to stop at each one ….looking for those perfect bowl blanks 🙂
Wood chipper destroying 100’s of bowl blanks!
I even watch TV and in the scenery there are trees that are crooked and gnarly and I think …..if only I knew where that was and could get there! I guess you could say I’m a little sick….. woodturning sick that is 🙂
My son put up a pole barn and had to take down 8 giant oak trees. Although we saved a lot, much of the branches were sent to the chipper and just about anyone who stopped by and wanted a trunk could have it. He wanted his yard nice and neat and I know he thinks I’m just crazy. If I can’t turn it, I burn it 🙂
Hollow Hickory Tree for the Mill or
Cut Up into Bowl Blanks
So, he brings down a 3 or 4 long trunks, 10 or 12 feet long. They were all solid on the small end but 2 of the bigger trees were hollow at the thick end. The wide end was close to 24″ wide, I could have gotten some awesome hickory bowl blanks but over half of the diameter of the tree was rotted through. Very disappointing to see most of the tree from center out was rotten.
Still…there was some good firewood in the rotted pieces, they would be easy enough to cut and split. So I just figured it would be fire wood. Also I could use it for my smoker, hickory makes excellent wood for smoking meat! Then a light bulb went off in my head and I had a brainstorm.
I had been Turning Spindle
Blanks into “Fishing Bats” & “Billy Clubs”
I was on a mission turning 3 to 6 inch branches into these bats along with vases, candle stick holders, tool handles and cups from what you could call spindle blanks which were for the most part branches.
Actually, I was currently making “fish bats” from 3 to 6 inch branches. I wanted to try and sell them to a couple of the local ‘bait and tackle’ shops in my area and thought I would put a few in my online store. So I had been working with my roughing gouge for the past week making long round blanks, which you could call spindle blanks for woodturning. I wasn’t sure what to call them, I guess they are a type of spindle blank. I just turn a piece until I get all the bark, worm holes and other defects out of the blank. Then I dry them …. drying long spindle blanks. This is when I decided to build a drying cage for spindle blanks.
How To Cut Hickory Spindle Blanks
I’ll see if I can post a picture of the end of one of these hickory tree logs. Basically it is hollow but there can be anywhere from 4 to 6 inches or more of good wood around the outside of the tree. This consists of the sapwood and heartwood in almost equal amounts.
How to use a hollow log for making spindle blanks for woodturning
So…. if you were able to harvest the first 6 to 8″ of the outside of the tree you would have 2 colors, the light sapwood and the dark heartwood. Could make some interesting projects. However in this tree there really wasn’t enough to get a decent bowl blank out of for woodturning.
Cut Sections With The Grain Out of The 24″ Log
Hickory is very hard. If you try to turn it dry its like turning concrete. These trees were very wet getting ready for spring growth so they were filled with water and nutrients.
I thought why not take my 24″ log I just cut and slice it down the length into sections that I could make some wide spindle blanks? I’ve never run across anyone discussing or showing how you can dissect a tree like this for woodturning blanks. You could cut a 6″ x 6″ x 24″ spindle blank if you wanted to turn a vase. I cut a couple 4″x 4″x 24″ slices for my “billy clubs” and “fish bats” and they worked perfectly.
Cutting a hickory spindle blanks for easy woodturning, piece is from a center rotted tree
Since they were kind of square and had some rotted material on one side I took them to the band saw and knocked off the edges with a jig I made and cut the rotted material off. I also knocked off the corners of the long hickory spindle blank. Turning a square into a octagon shaped piece really made it easy to turn. Hickory is dense and even when wet it was pretty hard.
Since Hickory has a very light colored, almost white, sapwood, and the heartwood is dark brown there were some interesting pieces. I actually turned a couple of blanks for some new tools I wanted with big….long handles. I was going to use oak but now I think I will do a couple with these hickory spindle blanks.
Can Woodturners Use
Rotted Hollow Trees?
I made this post because I wanted to share a new source of wood for woodturning that I discovered. I can’t tell you how many times I walked away from trees that I thought were too rotted and would not yield any wood for wood turning.
I could probably get 2000 or more pen blanks with nice color and grain from these rotted trees…..and that doesn’t mean the blanks would be rotted. As I said, I normally would have cut up the rotted stuff and used it for fire wood.
So next time you run across a tree with a rotted center start to think how you might be able to harvest wood for projects that would go with the the grain instead of across the grain. You could make rolling pins, bowling balls, vases, cups and more cups, bats, light sabers, billy clubs, tire thumpers and fish bats ….you get the idea.
Now I look at rotted trees with a new perspective. It is actually easier to harvest on of these logs because you can cut 24″, maybe 36″ or more off of the dead tree. Then split that piece in half with the grain, maybe split those in half again with the grain and load them easily in your truck or car ….get them home and further process them on your bandsaw or finsih with the chainsaw.
Take What You Can Get
I do not do a lot of spindle turning or end grain turning.
I like to turn wood bowls.
That said, if you are like me you probably have ignored the tree trunk with a big hole going down the center. I hope now if you’ve read this you might look at that rotted tree trunk laying there as a gift 🙂 There is so much you can pull out of the first 4 to 6 inches of the outside of a tree that is really is worth your effort to harvest some of that and dry it.
Collecting Wood for Woodturning ….
How to Use and Turn a Hollow Log
Keep in mind, you might find a tree that has at least 12″ of good material around the outside but because of the way it is laying or looks you think the wood isn’t worth harvesting for your woodturning needs. You are wrong, I have 2 or 3 oak trees that are at least 36 inches in diameter and as they lay on the ground rotted and hollowed out in the center there is more than 12″ of solid wood that can be cut for either spindle blanks or bowl blanks that can be used for your woodturning addiction.
hickory woodturning blank from center rotted tree trunk
And ….. often times the lower part of the tree has a good amount of disfigurement, that is burls, crotches and other deviations that give those turning blanks character that you won’t find anywhere else.
I hope you have at least realized that there is another way to look at trees that can be used for our woodturing habit. A rotten tree may be a liability to a homeowner, it just might be a dead tree in a forest but to you, a wood turner, you can slice and dice your way to harvesting some awesome woodturning blanks 🙂
How to Dry A Long Round Spindle
Turning Blank for Woodturning
I have some ideas for long round turning blanks, spindle blanks that can apply to a variety of woodturning projects. I’m basically taking a straight branch about 3 to 4 inches wide and turning off the bark and some or all of the sap wood from the piece leaving me a round blank at about 3″ plus wide ….it could be 12″ long or 30+ inches long. I will also take bigger branches and end up with a long round turning blank that is at least 5 inches plus wide.
What Are Long Round
Spindle Blanks Used For?
I can use these blanks for:
tool handles
bats
billy clubs
fish bats
rolling pins
noodle cutters
spaghetti cutters
handles
vases
cups
You get the idea, a long round rod shaped piece of wood. I turn the blanks and dry them. I store the blanks and when I’m ready for a project I select the dried blank and turn the project. Cracking and checking can be a problem depending on the wood species.
Spindle type blank for turning fish bats
Most Long Round Blanks Crack
My problem has been most of the wood I have turned has been very wet. I tried turning and setting on a shelf only to have them crack, at least one good crack. That’s OK, I just fill with epoxy and coffee grounds or just epoxy and color after it has finished drying and re-turn the piece.
Examples of dried and cracked long round woodturing spindle blanks
I’d rather not have to go through that process for each bat type blank know as a type of spindle blank. So the problem I have is how do I dry the piece and not have it crack. I realize each piece is normally a branch and has the pith through the middle so I need to do a slow, very slow dry. But I’ve even experienced the cracking in non-pith pieces.
I turned 2 vases from one oak spindle blank
How To Build A Drying Cage
I had an idea on how to dry these long round woodturning blanks.
Why not just dry them in shavings and sawdust like woodturning bowl blanks? So I laid a few of the long round turning blanks on the floor in a pile of shavings. Left them there for a week, I kept tripping over them. They were in the way of my workspace but when I uncovered them they were without cracks!
The Horizontal Long Round
Blank Drying Cage
Since I didn’t have any paper bags big enough to hold the long round spindle turning blanks I thought I would have to build something to hold the blanks and shavings but would also let air flow through so the wood blanks would dry. I thought of taking a large piece of pvc pipe and drill a bunch of small holes and fill it with shavings but that would only hold one maybe two blanks and I’d have to drill a million or so holes ….not a good idea.
Drying cage for roughed in spindle blanks made with wire and plywood
The I thought, what if I took some wire window screen and built a long horizontal cage? Simple enough, wrap the screen around a circular piece on the bottom and one on the top with a hole in it. You can make it any size. Make smaller cages for small long single round spindle blanks, make bigger cages 12″ or 16″ wide or more for multiple long round blanks.
Staple the screen to the circular bottom piece and top piece. Add 2 long horizontal stretchers to attach the screen to and hold it up. Place your blanks in the cage and fill it with shavings and sawdust. Place your vertical drying cage in an area to dry …..done deal!
It’s not rocket science 🙂 I built one with an 8″ diameter base. I wish I would have made it 12″ but I think I will make a handful of these drying cagesbecause I’m sure this will work. I did a quick video in case my words aren’t making sense.
I loaded up 3 fairly large long round spindle blanks. First I weighed each blank. Then loaded into the cage and filled with shavings and sawdust. The heat is still on in the shop and I placed the cage as high as I could ……I will re-weigh the blanks after 2 or 3 weeks and see how it works.
Should have Sealed The Ends of The Woodturning Blanks
As I think about it now …..I should have sealed the ends of each blank with wax, paint or anchor seal. I can’t believe I spaced off and didn’t do that ….maybe I will dump the cage and seal the ends of each long round woodturning spindle blank ….they’ve only been in for a couple of days!
Drying Results
I will either edit this post, do another article and/or post in the Wood Turning Basics facebook group the results of my drying cage …stay tuned!
If you have been turning wood for years or you are a newbie woodturner there is always one thing we all have in common…..that would be the need for wood or woodblanks to put on our woodturning lathes! You can’t be a woodturner if you don’t have wood!
So I always have my eye looking out for something that I can turn. I look for resources anywhere from wood floating down the river, laying on the side of the road, driving anywhere, to facebook marketplace and or craigslist. If you go to a landscapers work yard/office you’ll probably find a big pile of wood pieces, logs, branches and even root balls!
Wikipedia describes a Root Ball as: A root ball is the main mass of roots at the base of a plant such as a shrub or tree. It is of particular significance in horticulture when plants are repotted or planted out in the ground. The quality and preparation of the root ball will determine how well the plant will survive this transplantation and then flourish in its new situation.
Where Do I Get Woodturning Blanks
I’ve never purchased a wood bowl blank or any other type of wood for a woodturning project. Mainly because there is so much wood around my area and I really do not have the funds to pay for a wood bowl blank! We are all at different places in our lives, if you work all the time and enjoy turning wood on your time off you probably do not want to hunt for woodturning blanks and you probably have the cash to buy wood bowl blanks but as I said, you do not have the time to go out with a chainsaw and harvest your own wood ….and that’s cool 🙂 …..I’m happy for you. I was at that point one time in my life, you just need to prioritize time and efforts.
Surprisingly, Ebay is a very good source for purchasing wood turning blanks at a great price. Click on Woodturning Bowl Blanks
Who Looks For Woodturning Blanks
Anyway I think most wooddturners are on some type of budget, most probably are on the broke end of the budget and need to consider different sources of free wood for woodturning. So woodturners are always looking for that golden goose when in reality you can find free wood from a variety of sources and you just need to have a chainsaw and desire to go out and cut up wood you find on free piles!
The Weather and Seasons Help Find
The Best Woodturning Blanks
Well, weather often times has something to do with where and how you find that honey pot of wood for your woodturning habit. Spring has sprung in North America and people are out in their gardens and yards trying to get things ready for their beautiful yards. That means trees are trimmed, trees are removed and some trees are even dug up.
You need to keep an eye out for those piles of tree and bush cut offs. Some counties have a special day to put them on the side of the road for pickkup …..find out when that is and cruise the area the night before looking for woodturing blank treasures.
Turning Rootballs on Your Lathe
I started writing this article because I ran into a pile of diamonds in the rough 🙂 Only a wood turner would consider a dirt filled clump of roots a diamond in the rough 🙂
We’ve been self-quarantining ourselves because of the Corona Virus but you still need to get out and pick up groceries and in this case …pet food. We made arrangements to have the food to be left outside the store and picked it up, felt good to get out and on the way home I spotted IT!!!
Pile of Root Balls found on the side of the road
There it was a huge pile of torn out bushes, mostly stumps and root balls. My wife navigated us into the side street and I jumped out to examine my new treasure. It was piled on the side of the road for local township pickup. Most was soft almost rotted wood, I was kind of disappointed.
Found …. 4 Huge Root Balls for Woodturning Blanks
Then I turned over a couple of pieces and there they were….about 4 big huge root balls. I could barely pick them up and get it into the back of the explorer. I was thrilled. Looked like some cedar, pine, and other coniferous low growning ornamental type plants. I could see colors in the roots and tops.
A little digging and this cedar root ball came out of the pile
I know I’ll get at least 2 big bowls out of each root ball, or 3 or 4 vases out of each rootball.
Root balls are more difficult to cut up for mounting on your lathe than burls, there’s pieces sticking out all over, a little soft wood here and there. I’m goning to have to give a little thought into these pieces to get an idea of how I might get started.
Gonna Go “Furtado” On These Rootballs!
Al Furtado is the master of rootballs 🙂 I’ve watched him take what looked like a big mess of roots and tree trunks thinking there is no possible positive outcome out of this piece of garbage. But Al Furtado is the master, even if he starts the root ball as bowl and ends up with a vase …..it is always beautiful and stunning.
I found a big cedar root ball on side of the road
So…..I think I am going to try to go “Al Furtado” on you 🙂
I’ll try to do a video on how I dissect the rootball to get a piece or pieces for the lathe and video the project from start to end …..hope to get to it soon! So check back soon or sign up for notifications from me regarding woodturning!
Al Furtado turns a root ball into a spectacular piece of art
So …what’s the lesson?
1. Keep your eyes peeled while you are out and about. If you see a pile of wood that you might be able to turn, ask for permission to take it or if it’s obvious that its on the corner for township pickup …..you better grab it before someone else does 🙂
-make sure you have a vehicle you can transport roadside wood, explorer, suv, pickup -might help if you carried a chainsaw around with you, all gassed up, filled with oil and ready to go -battery powered chainsaws have come a long way, get one, keep it charged and you’ll be picking up more bowl blanks than you can imagine.
2. Pay attention to the time of year and weather. People do a lot of trimming in spring and fall, watch for their piles of trimmed trees and branches.
3. Did you ever see those guys trimming trees on the side of the road. Stop by with a case of water and ask them if you can have some of the bigger pieces…..I guarantee your vehicle will be filled with wood!
4. Introduce yourself to some of the local landscapers. Tell them what you are looking for, give them a card and ask if they can call you when they run into some decent wood for turning. Leave your card and some kind of gift ….like a couple of wood bowls…..they will call you, trust me.
5. City, county and township dumps always have trees, root balls and chopped logs just waiting for you to pick them up. Most cases you just drive up to the pile and take what you need.
Bottom line, you have to be a bit aggressive and get out of your comfort zone if you are not used to asking people for free stuff. In almost all cases, unless you live in the desert, you can keep yourself supplied with wood blanks for your woodturning habit 🙂
In my case I could see the root balls from the road as we drove by….part of the woodturning addiction I guess!
Turning a Root Ball
Turning a root ball is not for the newbie or faint hearted! It can be very dangerous and you need to be able to control your lathe speed and have good tools. If one of those turning root projections grabs you hand or arm it will break it!
You find a couple videos on different techniques for turning tree roots and root balls.
Guil The Bearded Woodworker turns a root ball bowl
Andy Phillip turns a beautiful wood root ball/resin vase
Woodturning 2 Cottonwood
Bowls Using Hurricane
5/8 Inch Bowl Gouge
Hi woodturning folks, I have a quick video today that I hope will help you to learn to be a better turner and me a better photographer. I’ve been testing camera booms, editing software and different cameras so I can ramp up my educational woodturning videos, so I decided to video a couple of cottonwood bowls I wanted to turn using only a Hurricane 5/8″ Bowl Gouge.
Cutting cottonwood log on bandsaw into 2 bowl blanks
I’m turning a couple of cottonwood bowls from blanks/logs that have been laying around for a year and a half. Both ends have been sealed so cracking is minimal. Many woodturners think that cottonwood or poplar are not good wood to turn bowls or other projects, I suggest they do a little research about using cottonwood for woodturning. Where to find cottonwood bowl blanks for sale.
I brought the log into the shop and cut it into two with the bandsaw using a 3/8″ 3 tpi bandsaw blade from www.sawblade.com
I marked the centers of each piece and put it on the circle jig to cut the cottonwood woodblanks into circular blanks. That went well.
Next I put each piece on the drill press and drilled a 2-1/8″ hole in the flat face to mount the SuperNova2 jaws in the recess.
Shaping the Outside of the
Cottonwood Wood Bowl
I began by trying to get the exterior a uniform shape so it will stop any wobbles or shakes. Once the shape is close I start to work on a recess/mortise at the tailstock end. I make mine 1/4″ to 1/2″ deep depending how big the bowl is. I work on getting a dovetail put in recess, this really locks the bowl onto the nova chuck. At some point I take the tailstock away and finish the recess with dovetail edges….. this is the new bottom of the bowl and is almost ready to be mounted on the Nova chuck.
Outside of cottonwood bowl shaped and ready to dry
I kept the bowl blank mounted on the nova chuck in the forstner drilled recess and the tailstock pushed up against the bowl the entire time. The bowl is shaped, has 2 coats of Zinnser Shellac Sanding Sealer, each coat sanded down to 320 grit. I will more than likely leave the recess in the piece. I plan on getting a branding iron and this is the area I will brand.
Plus by leaving the recess you can remount the piece in the event that it cracks or gets other deformities that can only be fixed by remounting on the lathe.
Wood Bowl Flipped & Mounted
In The New Recess
The bowl is now ready to be hollowed out.
The exterior of the cottonwood bowl is finished with sanding sealer and 2 coats of lacquer. All I have to do is turn the bowl around and mount the new recess into the Nova Chuck Jaws
Roughing Out A Cottonwood Bowl Blank
In this video I use a 5/8″ Hurricane Bowl Gouge with an Irish Grind to gouge out the interior of the cottonwood bowl to a rough shape. Woodturning a bowl consists of 3 basic phases.
#1 Attaching the wood bowl blank to your lathe
#2 Shaping Your Wood Bowl
-rough shape or form
-final form
#3 Sanding and Finishing
Drilling recess for Novachuck jaws in cottonwood bowl blank
This bowl first had a recess drilled into the wood blank with a 2 1/8″ forstner bit. on the bottom for attaching the wood bowl blank to the Nova Chuck. The exterior was turned to shape first, a recess was cut into the bottom of the bowl with a bowl gouge and special tool I made for attaching to my Nova Chuck with recesses/mortises.
The exterior of the cottonwood bowl was sanded down to 320 grit and I applied 2 coats of Zinnser sanding sealer . The bowl was then flipped over and inserted into the jaws of the Nova chuck. This was a dovetailed recess or mortise and about 2 7/8″ for the nova jaws.
As shown in the video I used my 5/8 Hurricane bowl gouge to hollow out the bowl to a rough shape. The thickness of the outside walls are approximately 10% of the width of the bowl …..in this case about 8″.
The wood was very wet still. However, it cut nicely, shavings were flying and it was an easy and fun bowl to gouge out. My bowl gouge was nice and sharp and I had some fun hollowing it out.
Preparing To Dry The Cotton Wood Bowl
I dry bowl blanks several different ways. This time I thought I would take it nice and slow. First I weighted the bowl with a Digital Scale. Then I put the bowl in a paper bag full of shavings. I put the bag on the top shelf, the heater is still on in the shop so it gets 80° plus….I’ll check it after a week. It usually takes about a month to get it to stop losing water weight…..then I know its dry.
Woodturing Cottonwood Into A Wood Bowl Video
Cottonwood Bowl Blanks For Sale
There is plenty of cottonwood in my area so I really don’t need to buy cottonwood bowl blanks but you might find yourself wanting to turn a cottonwood bowl and do not have access to cottonwood.
Surprisingly Ebay is a great source for cottonwood bowl blanks at fair prices, click here to check out what Ebay has to offer today!
I decided to start and develop a category for my Harbor Freight 12 x 33 wood lathe. It is the first woodlathe I used since highschool some 50 years ago!
Since a lot of new woodturners and old…..use this lathe, many have come up with unique ways to use and to modify the HF lathe. I hope to share some of
Harbor Freight 12 x33 Wood Lathe
the modifications and hacks you can make to your Harbor Freight 12 x33 woodlathe. These tips will help you turn your machine into a beast. For instance …..just one of the hacks I discovered allowed me to slow down my turning speed enough that I could turn bowls “outboard” (not over the bedways) that are 18″ wide ……soon going to find out if I can go 24″ 🙂
So as I find more HF lathe users and discover their modifications I will post them in this category. It could be simple stuff or a major rebuild. I hope as you read these posts you comment and let me know if you have a hack or modfication that I might be able to publish here!
Honestly, I do not know why I purchased this lathe. I had no interest in learning how to turn wood but I was in the harbor freight store, something led me to get one …..and that changed my life forever 🙂
This lathe is made in china. I believe it is the basis for many different name brand lathes …such as Jet and Grizzly. There are others that purchase this lathe and brand it with their name …..except for a few changes and upgrades it is the same woodlathe.
Beginner Wood Lathe
I found it to be an excellent beginner wood lathe. Its simple to operate, easily available and parts can be obtained for repairs. You can modify the lathe if you have the abilities. Add a Nova Chuck and a good Tailstock and with the right tools you are good to go. I purchased the SuperNova2 scroll chuck with 2 sets of jaws and a worm drive. The beauty behind the Nova chucks is that almost 100% of the accessories (jaws) fit all the jaws. I highly recommend you purchase the SuperNova 2 wood lathe scroll chuck.
The thread on the head stock is 1×8 tpi, this is important because you need to know this for accessories. The morse taper for headstock and tailstock is #2MT.
Also, something called the morse taper is important to know for both the tailstock and head stock, you will want to be accessories that fit a #2 morse taper for the HF 12 x33 woodlathe. For instance if you wanted to get a better tailstock live center you would need to know that it would have to fit a #2MT (morse taper)
Harbor Freight Banjo and Toolrest
It comes with a 3 piece banjo/toolrest that takes a little bit to figure out but once you do, you will able to reach around and in a lot more areas of a bowl or project as opposed to a single bango and tool rest. The metal is kind of soft, you’ll see pictures of the toolrest snapped off in various forums and groups …..just know it is usually due to user abuse and misuse.
Be careful of over extending your turning tools to avoid nasty catches and your tool rest should last a long time. I sand across the top of my tool rest a couple of times a year to remove nices and divits …..these will translate into your turning piece as your woodturning tool glides over a bump on the toolrest.
The tool rest and banjo posts are 25mm according to my measurments. That’s short of 1 inch, so if you want to build a custom toolrest you need to get some 25mm stock. Double check that measurement on your machine before ordering materials.
Custom Tool Woodturning Tool Rests will really increase your work abilities. For instance the S-shaped tool rest lets you get deep into your bowl and keeps the rest close to the wood so you are not over extending your gouging woodturning tool. Some guys just weld a piece of flat 3/4″ steel on a post and then can stick that into the bowl or project they are turning.
One more thing about the 25mm dimension for the post, hole of your bangjo. I have heard of some woodturners buying tool rests with 1″ posts and you can do one of two things:
sand down the post, its not too hard to remove a 1 or 2 mm from the steel post. Use a disk sander, grinder or even a file. I have not tried that because I have on my list of things to do …….building some tool rests with 25mm posts.
the other thing I have seen some HF woodlathe owners do is to drill out the hole for the toolrest to 1″, if you do not have that ability ….any local machine shop can easily do that for you. Now you can buy tool rests with 1″ posts ….there are lots of them.
Comes With 6 Inch Woodturning Faceplate
You also get a steel/iron 6″ faceplate that screws onto the headstock shaft. Pay attention to the shape of this faceplace because simply buying a faceplate might not get you the results you want because the back end of the electric motor sticks out far enough that the faceplate has to extend at least 1″ more than normal woodturning faceplates.
Consequently I purchased 1×8 tpi nuts to make my own faceplates and I purchased a Beall wood tap set to put 1 x 8 threads into a block of wood that can then be used as a faceplate.
So, when you get your new lathe you can attach a piece of wood in 2 different ways with the equipement that is included with the lathe purchase.
You can attach a piece of wood between centers, a headstock center spur is included and a Tailstock Live Center is included. Simply put the piece of wood between these two centers and use the tailstock live center crank to push the pieces tightly togehter.
Or…..you can attach the piece of wood to the faceplate, either directly or indirectly through a glue block.
Harbor Freight 12 x 33 Cons
As with any wood lathe, especially beginner lathe there are some cons.
The electric motor is on the small side, without some modifications you will not be turning 16″ plus bowls. The largest bowl you can turn on a stock machine is a 12″ bowl over the bedways.
A 12″ bowl is tough to turn unless you have a perfectly circular and balanced wood blank because the slowest speed is around 600 rpm. That is very fast for a big piece of wood. You would want to start around 200 to 300 rpm ….maybe slower. We can get into some hacks that will allow you to do that with this machine……I will write about that latter.
Although the bedways are of cast iron, the legs and horizontal supports are made of thin steel. Steel is a problem because it doesn’t add to the weight of the machine which would help to keep it steady. Consequently when turning unbalanced pieces the machine wants to walk or fly across the floor! Again, I’ve got some different ways to help you make your machine very stable and enable you to turn some big pieces of wood…….we will cover that in another post.
The Harbor Freight 12×33 wood lathe has what is called a Reeve’s Drive. This allows for adjusting the speed from 600 rpm to 2500rpm. It is not a variable speed control but a method that allows you to change the speed by lever which means you do not have to pull the cover and change pulleys and belts. It is a nice feature but variable speed would make it a dream……again, I have more on how to do that and will cover motor and speed control replacement in further posts.
Harbor Freight 12 x 33 Specs
This high quality wood lathe is ideal for crafts, hobbies and professional woodworking. The 3/4 HP motor on this lathe reaches speeds of up to 2,400 RPM for quick and precise turning and facing. Features include a pivoting headstock to allow extra-large bowl turning capacity.
Return Policy for Harbor Freight Wood Lathes
I should add. If you buy from your local Harbor Freight Store you can return the item without a hassle as long as you make the return within the period they specify. I do not know what that is for the lathe but ask before makeing a purchase. I’m sure the return and refund process is different for mail order …..just make sure you understand it. I say this because every now and again you will run into a lemon when buying Harbor Freight products but in general they are very good when it comes to refunds, returns or exchanges.
Current price is $399.00, however, they often will have a sales price on this unit and they have coupons you can use. Although I’ve been told they no longer allow you to use the 20% and 25% off coupons, then again, I’ve heard of others that are able to use the coupons ……so best bet is to talk to the manager and do some fast talking for a decent discount.
Harbor Freight 12 x 33 Wood Lathe Features
Pivoting headstock for extra-large bowl turning capacity
Headstock rotates and locks in position at 45°, 90°, 135° and 180°
Swing over bed: 12 in.
Variable speeds: 600-2400 RPM
Turning distance between centers: 33-3/8 in.
CSA Listed
SKU(s)
34706
Brand
Central Machinery
AC Volts
120
Accessories Included
Stand, tool rest, drive center, 6 in. disc, and Allen wrenches
Amperage (amps)
6
Certification
CSA
Distance between centers (in.)
33-3/8 in.
Horsepower (hp)
3/4
Speed (max)
2400 RPM
Minimum Speed (RPM)
600
Number of speeds
10
Phase
Single
Product Height
45-1/2 in.
Product Length
5 ft.
Product Width
15 in.
Shipping Weight
187.85 lb.
Spindle size (in.)
1 in.
Tailstock taper
MT2
Travel length (in.)
2-1/4 in.
Harbor Freight Wood Lathe Review
This guy has been turning some awesome projects on his Harbor Freight Wood Lathe and he did a quick review with some pros and cons ….quick video and well worth your time to check out!
I decided to start a series of posts and articles that feature wood bowls and other wood turnings made from pieces of wood from firewood, the burn pile or some old wood pile that is ready to get burned for a campfire or bonfire. Basically these will be projects that were turned from free wood found in someones yard, side of the road or in back of some tree guys truck 🙂 It will be free wood for woodturning that is found someplace and dragged home 🙂
A winged bowl made from a piece of hickory firewood
First let’s take a look at a few things any new woodturner needs to know and old turners probably already know but can share with some of the woodturners they mentor.
How To Start Turning Wood
Once you get bitten by the “woodturning bug” you will began a journey of learning how to use new tools, a different assortment of supplies and at some point you will think about considerating some of the bigger woodshop machines. Let’s face it, you’ve either become a tool junky or it was always in your genetics!
Then each tool or machine you buy needs to be learned. You have to learn how to maintain it and use it. For woodturning tools you need to learn how to use them and you need to learn how to sharpen them.
You need to learn what makes a good woodturning tool, what steel is best for you to get started and what woodturning tool sharpening system you need to invest in.
You might want to pick up a cheap set of woodturning tools so you can learn how to use them but more importantly ……learn how to sharpen them.
I suppose I could go on with a list, sentence or paragraph on what you need to get into woodturning but that’s not what I am interested in right now.
My point is there are many different aspects involved in woodturning and at some point you will need to be proficient at all of them. However, do not be dismayed, it’s a process all woodtunrners will go through and you will too.
What Wood Do I Use For Woodturning?
I can’t tell you how many posts are made at our FaceBook Woodturning Basics Group regarding the wood they will put on their lathe. Should the wood be green/wet or dry. Should I start with species A or B. Can I turn construction grade lumber? Can I cut a piece off the tree that fell in the yard? Or can I saw a log/tree on the side of the road, is this good for turning? Or should I go down to my local wood store and buy a bowl blank?
First let me say, if you have to buy all your wood blanks for turning you either have a lot of money or you will end up spending a lot of money.
Learn How To Make Your Own Bowl Blanks
It’s best to understand how a bowl blank is formed and cut from a piece of a tree. Once you get a handle on that you can start your own collection of bowl or turning blanks to work with ……and it will probably be free wood!
Wood bowls can be defined by an unlimited number of shapes. Often times the shape wood bowl is determined by the shape of the log or piece of firewood you might have. One of the things I do is to “Google” wood bowls, and/or wood bowl shape and check out the image tab. It will give you a ton of ideas and inspiration.
Another place to search is YouTube. Same thing, search for wood bowl shape, or turn a wood bowl and you’ll come up with 1000’s of videos that will help you understand what you can turn. You can even type in “bowl from firewood” and you’ll get a couple 100 hits.
Most of Us Want Free Wood
Here’s a link to some free wood sources . You just need to keep your eyes open, carry a chainsaw around with you and pull off the side of the road when you see a tree laying in the culvert ….or on the road and cut up a few pieces for yourself. You will be surprised at how much wood you can collect if you just become aware of your surroundings.
That said, there is also Facebook Marketplace where people are looking to give away free wood all the time, check out ebay and also craigslist. Don’t forget the bulletin boards in some of your local stores, or print up some cards for yourself saying that you are looking for free wood for your woodturning business, pass them out, pin them and you would be amazed at what comes back at you. Throw in a free wood bowl and that will seal the deal.
A source of wood for woodturning I really did not think of or expect was firewood. Yes, firewood for woodturning is a cheap source of wood for woodturning if you live in the city or suburbs and have problems getting wood for your woodturning habit. Have you seen a small bundle of firewood in front of a 7-11 store or quick market? Since we heat with wood, when I’m sick, I get a full cord of chopped wood, all different species that is dried and ready to put in the wood stove. Yes I heat our home with a wood stove and we can go through quite a bit of chopped wood, I almost always do it myself but last couple of years I’ve been sick and had to buy chopped wood……killed me to do that 🙁
Campfire Wood Packs for Woodturning
Some guys will pick up one of those little packs of firewood (meant for a campfire) and bring them home to look and see how they might be able to cut to fit on their lathe. In fact, I was surprised at how many woodturners were doing that.
So, I decided create a category called “Firewood to Wood Bowl” where I will discuss how you can turn a piece of firewood that was intended for the fireplace or wood stove but ended up on your lathe and you turn a beautiful project!
I want to be able to cover some of the different ways you can mount a piece of firewood on your wood lathe. Whether it be between centers or installed on your chuck.
So, I thought I would just mount a piece of firewood on the lathe and see what happens and where I go with it. In many ways, these turn out to be some of the most beautiful projects 🙂
Looking For Strange Wood Sources That Yield Wood Turned Pieces of Art
I will also search for others who have taken that strange looking branch or piece of firewood and end up making a woodturning that is worthy of being called a work of art. At the same time, I will look for those who turn firewood pieces into functional pieces that can be used every day.
I live on a river. Logs float down stream all the time. I think I will cut a few river blanks for woodturning and see what I can turn! Those that manage waterways would be only too happy to let you load up a truck or your trunk with some cut offs. Remember…..think outside the box!
Picking Out Your Pieces
From The Firewood Pile
For Woodturning Blanks
Usually I look for the piece of firewood that has good color, is dry and has some meat to it. That is, you have a substantial piece of wood in your hands.
At this point I usually don’t have any idea what I want to turn. All I’m concerned with is how do I mount this piece of firewood on my wood lathe…..and am I going to turn a spindle shape or will it be a bowl of some kind ….or can I make it a combination of bowl and spindle?
How to Mount the Piece of
Firewood for Woodturning?
Most firewood pieces are triangular shaped or could be a rough shape of 4 sides. The question we ask ourselves is how do I get this piece of firewood on the lathe?
When I mount a piece of firewood on the lathe I consider 2 options.
Should I mount the piece between centers along the length of the bedways, in line with the endgrain? Or should I mount the piece perpendicular, that is 90° to the bedways.
Lets say I mount it perpendicular to the bedways. Next I need to determine which side will have the tenon or recess and which side will have the tailstock pushed into it. Keep in mind, the side with the tailstock pushed in is more likely to be the top of the bowl you are going to turn.
Piece of hickory off of the firewood pile that will be turned into a winged wood bowl
This piece came from a bigger piece of firewood, I could see the color and just couldn’t keep it in the wood pile. So I mounted it on the lathe. Turned it a while until I decided I wanted to do a winged bowl of some sort.
So I used a 2-1/8″ forstner bit to drill a hole for my Nova Super2 Chuck.
Hickory firewood piece gets drilled for recess for Nova Chuck 2″ jaws
It looks like walnut but it came from a pile of firewood that had oak, hickory and cherry in it. So, I’m guessing its Hickory. It was a fun project, kind of challenging. You need to be careful because it basically becomes something similar to a propeller on an airplane. You need to turn it at high speed and you need to be familiar with “ghost” turning.
If you try something like this make sure all your safety gear is on because a catch will cause big problems. I like the challenge, even if I can’t see as well as I used to. You can always compensate for your inabilities. For me, I installed all LED lighting fixtures they simply screw into a keyless fixture and the brightness is amazing. I can see the ghosting of the winged bowl, makes it safer and I know where I am cutting (gouging).
Someone will fall in love with the shape, form and color! I just kept turning until it looked like something I might be proud of. Remember a bowl doesn’t have to be a round piece of hollow wood. You can turn small bowls, cups, vases, billy bats or flat plates from wood that comes from the firewood pile 🙂
A winged bowl made from a piece of hickory firewood
So, in this category I plan on showing off some of my work that was done with firewood and I’ll find firewood projects done by others and post them here.
How to turn hickory firewood to wood bowl.
The whole idea is to open up the world of possibilities when it comes to wood and woodturning. And hopefully share techniques and methods to make some of these projects happen.
Keep in mind. Its easier to turn a prepared round blank than a piece of firewood. But if you get the concept you will become interested in seeing if you can duplicate some of these efforts. As always, please be safe. If you think it is too dangerous to follow someone in a video or pictures then …..wait a while until you get better acquainted with your tools, equipment and skills!
A piece of wood is a piece of wood. It can become a simple bowl or a piece of art. My friend Al Furtado will take the ugliest piece of wood and turn it into an expensive piece of artwork….. you can too if you practice and learn the basics of woodturning 🙂
Woodturning Basics
I try to keep in my thoughts the basics. It’s easy to get board with turning salad bowls all the time. So….I try to mix it up. I’ll grab a 3″ ash branch and turn a billy club …or billy bat as my grandsons say. Latter in the week I might go to the wood pile and find some burled oak pieces of firewood. I’ll take those to the bandsaw and cut up some square blanks to be used as pens or pizza cutter handles. I’m always looking for that log …..that will give me a beautiful vase. Then there is a spalted maple log, half rotted that I decide to make a project of with some epoxy.
I always go back to the firewood pile. Guys who sell firewood will tell you its all oak and its all dry. They are lying on both parts. You’ll find every local species in that pile and it won’t be dry. Sometimes I just take the piece of firewood and turn it round, throw it in the corner or in a box and let it finish drying…..I got a round blank that might become a handle, rolling pin…billy bat or …..well, you get the idea!
Woodturning A Firewood Log To Bowl, Woodturning Firewood, Woodturning Rescued Cedar Firewood, Wood Turning Firewood
Woodturning A Firewood Log To Bowl, Woodturning Firewood, Woodturning Rescued Cedar Firewood, Wood Turning Firewood, Wood Turning Firewood, Woodturning Firewood Videos, Woodturning Rescued Cedar Firewood Wow
Since this is a blog about Woodturning Basics I like to post content that brings us back to our beginnings. That is always relatable because every day someone buys a new lathe and has no idea how to use it. Every day something causes a casual woodworker to buy a lathe, buy some woodturing tools and even buy a new woodturing chuck ……but they have no idea how to use them.
Wood Bowl Finishes
Every day someone turns their first project and then realizes it needs to be finished…..how do I finish my new bowl?
Once again, a subject like woodturning finishes could fill a book easily. You could probably spend your woodturning lifetime trying and learning how to use different woodturning finishes.
One aspect to consider when deciding on what type of finish you want to use for your wood bowls….. you have to ask, is it food safe if you are going to use the bowl for food or drink.
I’ll suggest 2 wood bowl finishes that are food safe and I use them inside my bowls all the time.
There are many, many finishes. You can use plain Shellace, comes in many varietys ….or you could make your own finish like Eddie Castelins OB Shine Juice, a very good (and cheap) utilitarian finish, easily apply multiple coats in a short period of time.
Wood Bowl Repairs
I would be remiss if I did not at least mention some of the tools you need to repair wood bowl repairs. Wood checks, cracks and shrinks. You might turn a beautiful bowl and because the wood wasn’t dry or didn’t get dried properly you get a crack.
To fix a crack you need some glue, sawdust, shavings and maybe coloring dust. CA is the easiest to apply and with an accelerator it will stick quickly, instantly.
The idea is to rub some sawdust, coffee grounds or shavings and push it into the crack or hole. Apply some thin CA glue and then spread more sawdust or coffee over it, push it into the hole or crack and apply more CA. Then you need to sand back to smooth.
There are all types of CA available. I try to keep on hand a
Stick Fast has a CA kit that contains all you need to get started using CA on your woodturning projects, you can even use it on small projects like pens, and you will find a use for the thicker viscosity CA’s are you began to turn more and more …..I recomment you check it out.
I could go on with the questions but suffice it to say that learning to be a woodturner encompasses many different aspects of working with wood. We learn these methods, processes, equipment and tools one at a time!
So, if you will, allow me to talk a little about how I got started. Then, how you might get started. And finally a couple of good videos on learning how to turn your first wood bowl!
Oak wood bowl with cracks filled with CA and coffee grounds.
Learning how to turn your first bowl
Warning ….woodturning is a highly addictive habbit. Be prepared to spend mornings, afternoons, days and nights in your shop learning all the different aspects of turning wood!
How to Learn Woodturning
I started out by betting a wood lathe from Harbor Freight and a cheap set of chinese woodturing tools ….again, from Harbor Freight. My only experience prior to that was maybe 40 years or so ago in high school wood shop class.
My lathe came with a 6″ faceplate. This is how you attach to the piece of wood you want to turn to the lathe. It also had a spur drive center with a morse taper and and live tailstock center for the opposite end. Basically this setup was for turning spindles.
My first project was some kind of candle holder for tea candles. All I did was take a branch, put it between centers ….it was about 6″ long. I turned some design into it and then drilled a hole for the tea candle.
I was hooked 🙂
My next project was going to be a cup/mug made from about [4 or 5] 2×6’s glued up.
Even with my dull chinese tools I was able to turn the outside and make it look pretty good…..in fact, it looked awesome, the wood cup
2×6 wood turned cup
had a construction look which was exactly what I was after.
Woodturning Hollowing
Then I had to hollow out the inside!
If you plan on turning cups, deep bowls or hollow forms you really need to use hollowing tools. The Easy Wood hollowing tool is great for beginner and experienced and you can get one on Amazon
That’s when I got into trouble. I didn’t have the right woodturning tools. The tools I had were dull (I had no idea how to sharpen) the tool rest was all wrong……and I had a catch every 15 sections or so. I did finish hollowing but the inside looked as rough as the bark on an oak tree 🙂
I wanted to waterproof the inside of the cup …..that led me to google/youtube to do some research and I discovered the online world of woodturning! I did eventually find a food safe epoxyto coat the inside of the cup ….and surprisingly it turned out pretty nice. There is a learn curve with wood epoxy finishes, however, the results are well worth it. There is even a whole world of epoxy resins and castings for woodturning but that’s for another day!
Sharpening Woodturning Tools
I couldn’t end this article without making mention of a couple of things regarding woodturning tools. No, you don’t need an expensive set of turning tools. In fact in my opinion you should buy a cheap set of turning tools and as you began to learn how to use them you will need to learn how to sharpen them.
This may be hard for you to comprehend right now. However, lets say you picked up a cheap set of wood turning tools. You also purchased the sharpening jig and at this point you have practiced for a year and you are ready to move on to bigger and better tools.
Don’t think those old tools are wasted. All you need is a grinder and your sharpening jig and you can reshape your old tools and make them into specialy tools. These tools can perform special tasks and are open to your imagination. Al Furtado is someone who has repurposed a lot of his tools and I have copied some of his favorite tools ……this will give you a lot more flexibility and satisfaction in your abilities and your projects.
Sharpening your bowl gouges and other turning tools will ultimately decrease the size of the tool and shorten the life span of your tools. That’s why it makes sense to invest in a sharpening system and practice on cheap woodturning tools. After a period of time you will feel confident in your abilities to sharpen your wood turning tools and you can buy more expensive tools made with the best steel.
I invested in the Wolverine Oneway Sharpening Jig, one of the first of its kind and there are many imitators. This system is built from strong steel and made to last ….I have heard that the knock offs (those who copied) are made of stamped steel and just cheaply made. I love my sharpening system and its one of the best purchases I made for turning wood.
Carbide Tipped Woodturning Tools
This may be the first article or blog post on woodturning and you are swamped with questions and ideas. I’m trying to expose you to ideas and concepts ….mostly tools that you will need along the way.
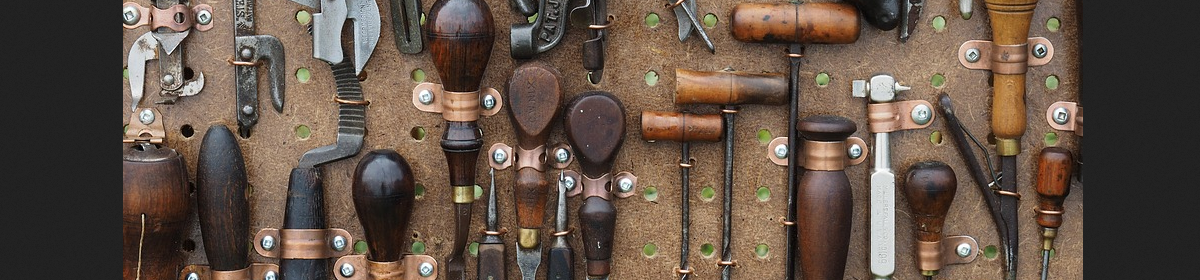
So lets assume you have a piece of wood mounted on your lathe. Next you need to be able to shape that wood with some type of woodturning tool. Again, it takes another book to tell you which one to use but suffice it to say that a bowl gouge is for makeing bowls, spindle gouge is for making spindle type items. Hollowing tools dig out the inside of a cup or bowl. Parting tools act as a slicing tool to remove a turning piece from the chuck or faceplate. Roughing gouges are mainly for turning cylinders when the grain goes with bed of the lathe. And scrapers can be used just about any where. There are many more tools but these are some of the basic traditional tools.
Woodturning Scrapers
Carbide tipped woodturing tools are mainly scrapers. They consist of a handle, square or round bar with a carbide cutter or insert screwed into the end of the bar. The carbide cutter comes in many shapes and sizes. You have square cutters, radiused cutters, diamond cutters, negative rake cutters and round cutters ….all of different sizes.
The benefit with carbide cutters is that you do not have to sharpen them (although you can) you just rotate the cutter to a different face …tighten it back down and start turning again. They are sharp, last a long time and can hog off a lot of wood. You can learn how to make traditional cuts like shear scraping and slicing which help to eliminate endgrain tear out. But they are a modern tool and some dispise them while others will only use carbide tools.
Bottom line is whatever gets you going with turning wood ….is a good thing. Learning all the different aspects of turning wood will take a lifetime and you should have fun doing it and not argue the finer points of traditional vs new.
I made my own carbide tipped turning tools. I’m not a metal guy but after watching a few videos I gave it a try. Now my 15mm round carbide tipped tool is one of my favorite when I am turning something that is a little scarey.
Easy Wood Turning Tools has some of the best carbide tipped tools you can get. They make a small size for doing things like pens, mid size and full size Easy Wood Turning Tools.
My Favorite Cannot Do Without
Traditional Woodturning Tool
Before I leave the subject of Scrapers for woodturners I wanted to mention a traditional set of 1-1/2″ by 3/8″+ scrapers from Hurricane woodturning tools.
This set comes with a full round front and if that’s all you can afford…..get that one. The other 2 are a left and right bowl scraper.
These tools take a beating. Once you learn how to use them you can refine the shape of your bowl or turning object with confidence. You do not have to be afraid to stick this tool into a rotating piece of wood…… hold on and approach slowly and your shape will began to be difined. You can define shape, you can hollow and you can shear cut and slice with these tools.
Sharpening is a breeze, determine what angle works best for you and lay it on the sharpening platform and run it over the grinding wheel once or twice.
Learn how to introduce the tool into the spinning piece and you will build your confidence and do things you never thought you could do before. Approach at less than 90° off of the tool rest and you will almost always be able to automatically spill a catch.
I use these scrapers when I am in a scarey situation but do not want to quit. I start with the carbide tipped tool…. if that doesn’t work I will try the big tradional scrapers. Do youself a favor and get a set of these……they will last a long, long time! Add to your tool collection with these 3 Large woodturning scrapers from Hurricane!
I use these all the time and consider them to be a must have for any woodturner!
How I Learned to Turn Wood or
My Woodturning Start!
I’ve had some health problems that prevent me from going out much. So, joining a woodturning club was out of the question. Going to wooddturning conferences was out of the question. And since I couldn’t find anyone near me that would be willing to come over and give me a few tips I had to learn how to turn wood on my own.
I read books. I read magazines. I used Google and probably learned the most from youtube. Learning from Youtube gives you the good and bad. You can learn from others videoing their mistakes and you can learn watching others turn outstanding projects.
If you are a complete newbie to woodturning the problem you will have is knowing what questions to ask and where to ask them. I have this blog and I also run a Facebook Group called Wood Turning Bascis at https://www.Facebook.com/groups/woodturningbasics. You can ask any question there and find someone to help you. I delete any member that makes fun of newbies or makes newbies feel uncomfortable. But I learn something new almost every day, certainly every week about woodturning.
Learning Woodturning On Youtube
Youtube can be your woodturning coach and friend. As you start to learn the different aspects of turning wood you will began to learn the parts, pieces and procedures used in woodturning. Now you can use those keywords to search for specific problems you might have. For instance, you might have read about woodturning chucks but do not know what is the best. Search “Best Woodturning Chuck” and you will be on your way to learning what type of chucks are out there, which ones are the best ….and which ones you might be able to afford …………check out Amazon for woodturing chucks
I found that the Nova Chucks had an excellent reputation and many woodturners recommended it. All parts are interchangeable and they come in a variety of packages. They are unique in that they have spindle adapters that make the chuck able to be used on a variety of wood lathes. So if you upgrade your lathe and the spindle size is different you can just buy the probably spindle shaft adapter. A fact that isn’t easily understood or learned quickly by the newbie woodturner. I purchased the SuperNova 2 with a couple sets of jaws and worm screw and couldn’t be happier 🙂
Maybe you just got started and you have no idea which tool to use. Again, search youtube for best woodturning tools or go to our Facebook woodturning group and ask what tools other members bought and would suggest to buy .
How Do I Turn My First Woodturning Bowl
OK ….I have some tools and want to get started …..what do I do first. I’ll give you 2 videos to watch. These videos will help you get started in your woodturning asperations.
Turn Your First Bowl ….A Video Class on Woodturning
Shawn Graham has a youtube channel called “wortheffort” ….he’s a good ole boy from Texas and loves to teach about woodturning and woodworking. I suggest you follow him and learn from him …..I’ve picked up all kinds of good tips and methods for turning wood and working with wood.
This video is a basics type video on how to turn a bowl. Good information and you will be a better turner after watching and applying what he teaches. His approach is understandable and the photography will be very helpful to anyone wanting to learn how to turn wood.
Here’s the index for this video in case you are looking for a specific aspect of woodturing:
In-depth video class for those interested in turning their first wood bowl on a lathe. Taken from the perspective of a new wood turner or someone interested in this side of the craft.
———————————————-
Table of Contents:
00:50 – 1st Lathe
03:45 – Lathe and Tools
05:55 – Chucks
08:24 – Lathe Gears
09:40 – Initial Lathe Upgrades
11:45 – Tune Up Tool Rest
12:40 – Additional Tools
14:08 – Band Saw
15:20 – Free Wood
19:50 – Mounting Wood to Lathe
22:21 – Grain Direction
25:55 – Bowl Gouge
26:40 – Spindle Roughing Gouge
28:50 – The Supported Cut
31:30 – Tool Rest Placement
34:16 – Gliding on the Bevel
36:00 – Front Hand
37:45 – Big Muscles
40:10 – 1st Cut, Rough to Round
47:20 – The Corners
53:00 – Mount in Chuck, Tenon
57:15 – Shape Outside, Shear Scrape
1:01:00 – Surface Rim
1:04:30 – Bowl Thickness
1:07:45 – Bowl Scraper
1:09:30 – Remove Tenon
1:13:08 – Conclusion
—————————–
“How to Turn a Basic Bowl-Part I“
The Youtube Channel “FineWoodworking” has a video called “How to Turn a Basic Bowl-Part I” by Richard RAffan ….an awesome teacher and woodturner. Not only will you learn about turning a bowl you will learn what woodturning questions to ask. He makes everything so easy, pay attention to all the details he discusses and watch how each tool is presented to the bowl.
Part II
The youtube channel “Carl Jacobson” has a ton of followers and although this video is not a basic video on how to turn a bowl, it does take you back to the basics, the title being
“Woodturning Back-to-Basics #3
Turn a bowl without a chuck”
Back in the day there was no scroll chuck, or woodturning chuck. You turned between centers or you used a faceplate. Carl talks about and shows how to turn a bowl without a chuck.
FUNdamentals of woodturning: #1 The faceplate
Youtube channel “Wyomingwoodturner” …..watch his stuff. Sam DeAngelo is someone I have learned so much from. In this video Sam talks about “The faceplate is at the core of woodturning. Sam covers techniques for utilizing this simple tool:
There are many other woodturners that I have learned from, some should be household names for any wood turner like Eddie Castelin, Mike Peace,RoboHippy,Brian Havens,As Wood Turns, Cindy Drozda, Mike Waldt, Kim Tippin, Al Furtado, Larry “The Wood Whirler”, Andy Phillip ….I know I missed a bunch of excellent woodturners …..I had hoped to give you guys a place to get started when it comes to turning wood. Again, I encourage you to join our Facebook Group at https://facebook.com/groups/woodturningbasics for help in all your woodturning needs.
Every now and again you will read or meet up with someone who likes sanding 🙂
I can almost say I hate sanding, however, it is the key to developing a flawless finish on your wood bowl. I’m not going to say much here except that fact that you need to get used to it and you need to follow the progression from low grit to high grit.
The better you are with your tools the higher grit you can start with.
I usually apply a couple coats of sanding sealer. I then try to get a better finish by using my woodturning tools to smooth out the wood as best I can.
I then apply another couple coats of sanding sealer and will start about 120 to 150 grit if my original finsh is in pretty good shape. Then I move on to 220 and 320 grit.
Now I am ready to apply the finish of my choice. Usually Lacquer on the outside and one of the foodsafe finishes on the inside. I will use scotch pads or steel wool to rough it up and smooth it further before applying more coats.
Sometimes my finishes will look like glass and just beautiful ….other times I still have failures and have to go back and start from the beginning …..or toss the bowl in t he fireplace 🙂
I read someplace that shiney, high gloss sells. So if you are trying to sell your woodturnings you need to perfect your high gloss finishes.
For me I can get a depth of luster from a Satin or Matte finish. It takes more coats but it can be buffed and polished or waxed for a beautiful finsh with the high gloss.
Do yourself a favor and turn a bowl and finish it with the most basic of finishes. Try mineral oil. Try mineral oil with beeswax and some diatomaceous earth. Try some of the Howard’s finishes. Give Acks a try or Triple eee a try. There are many finishes out there, all work differently on wood of other species ……but remember…..sanding is the secret to a perfect finish.
After watching Capn’ Eddies videos I realized that he preached the perfect finish comes from sanding. Skip a grit and your project will look like shit ……I don’t think he said that but I just did 🙂 However, the Capn’ always preached that you need to go through the progressions and not skip a step to get that mirror/flawless finsh.
I’m not going to go through the types of sandpaper here. But it seems as though each month there is a new sanding medium. Pay attention to these and if your budget allows ……get some and try them out.
I’ll do a special post on sanding and sandpaper soon.
Conclusion on Turning A Wood Bowl
Assuming you are new to woodturnig it might seem like there is just too much to learn, too much to buy and too dangerous to try to turn a wood bowl on your own wood lathe.
Yes there is a lot to learn.
But no, the negatives do not outweight the positives. It sounds more difficult that it really is and from a very basic standpoint …..you can get started very cheaply.
Our facebook group has young boys and girls turning wood ….of course with some guidance. Having a mentor, joining a group or watching youtube and reading articles is a wise decision when getting started.
You’ll find other woodturners all too willing to help you get started in your new hobby.
Every hobby, sport or pasttime has costs. As far as woodturning is concerned you can start for a small investment and build your collection of tools and equipment as time rolls on. I started for less than $300 and then found out that I could build a lot of my own tools and jigs to increase the size and quality of the projects I wanted to turn.
You might want a small lathe just for turning pens. Once set up, you only have to buy the turning supplies and your initial investment would be one of the smallest lathes made.
Maybe you want to turn larger bowls or spindle shaped items. You can search Facebook Marketplace, Craigslists and Ebay for used equipment. There are auctions where you can get awesome deals on used woodturning equipment.
You can start for next to nothing if you are willing to do the work…that is looking for deals.
Just the same, if money isn’t an issue you can get the best of the best and let’s say something comes up or you just do not want to pursure the hobby anymore. You can almost get your original investment in any tools or other woodturning equipment you buy.
I did not talk about what you might want to do with your woodturning projects. I think most woodturners give away their work ….or collect it for themselves 🙂 However, once you get good at turning different projects like:
-pens
-bowls
-cups
-spindles
-bats
-pizza cutters
-sinks
-boxes
-bird houses
-snowmen
-ornaments
-vases
-turning a root ball into a work of art
-woodturning business cards
-Legacy turnings
-YOU NAME It
You can sell these items at markets, shows, or online. You can make a profit to use as you see fit or reinvest in your woodturning tools and equipment.
For me, it started with turning bowls. I wasn’t that good but I kept trying. I worked the problem, found out I needed to sharpen my tools, I needed some new tools and I needed to perfect my techniques for each project I considered.
But it all started from wanting to learn how to turn a wood bowl! There is something that is very satisfying from turing a piece of firewood into a bowl or learning how to slice a log, mount it on to your lathe and turn a functional bowl or piece of art. In either case it is a one of a kind piece, never to be duplicated!
I genuinely hope you get something from this article/post. I hope you get some encouragement and direction. All the products that I mentioned I have used. Some of the links will result in me getting a small commission or affiliate payout. It is a very small amount but it helps me to pay for my hosting and other website costs so I very much appreciate if you buy these suggestions through my links 🙂
One of the Woodturning Basics Facebook group members had a question regarding wood bowl drying and blank drying. I’m a little late with my reply so I thought I would post an answer here.
One thing to remember about drying wood for woodturning is that it is almost always different for each project. That is, same wood species, same size blank and same bowl blank shape …..seems they all dry differently. Sometimes you get cracks and checks …..sometimes you don’t. However, there are some things you can do to get similar results on a consistent basis.
You can approach the subject of drying wood from many levels of understanding. There are FB groups that focus on nothing but drying wood, you could start your own blog if you had an intimate knowledge of drying wood. For our purposes, drying wood for woodturning can be very basic or can get somewhat complex depending on how you want to approach the subject. Some turners will turn green wood to finished size and shape and call it quits …. and some turners will take it to the other extreme of needing to have a bowl blank that is totally dry and acclimated to the humidity in their shop before they will turn and finish a bowl.
I like to keep my woodturning fun! I want to enjoy the process and not get too caught up in details other than safety!
For me, turning green wood is a lot more fun than turning a dry, rock hard piece of wood that requires you sharpen you tools every 15 minutes…….but that’s me.
And, I like to turn finished green bowls. Let them dry, warp and hopefully not crack. However, when doing it this way I turn with a recess so I can chuck it up if it cracks and needs repair…… others will say that is not the way to turn wood …..but it works for me 🙂
Anyway, I thought I would post some ideas, thoughts and videos on how others approach using things like anchor seal, paint and wax for sealing and drying their wood turning blanks and bowls…..so let’s get started!
Anchor Seal and Drying
Wood Bowl Blanks
Bryan, sorry didn’t reply to your txt ….had some outpatient surgery, been in and out of it for last couple days.
Is the wood bowl blank roughed out? In other words, did you roughly turn the bowl with the thickness of the walls of the bowl being 10% of the width of the bowl. So if you were turning a 12″ bowl (roughing it out) the wall thickness should be somewhere around 1-1/4″.
Do not use anchor seal on a rough turned bowl, dry in shavings or kiln
You really don’t want to put anchor seal or any other wood-sealant on a rough turned bowl. You will want to dry it using the shavings in a bag method, you could try to put the bowl on a shelf, floor level to mid floor say 4′ up and see how it is drying …..if it starts to crack, throw it immediately into a bag or box of shavings.
log ends painted and cover
There are a handful of products used to seal end grain on wood from trees to keep it from drying too fast and therefore cracking and checking. Anchor Seal is one of the popular sealants to use for end grain sealing, however, check out what is available for end grain sealers if you have an unusual situation and for a greater variety!
Make a Portable Kiln
For Drying Wood Bowl Blanks
There is a guy who sticks a light bulb in a box along with the rough turned bowl and sometimes a small fan, he will put a thermometer in there and he will have a vent hole in the box someplace. Basically you are setting the bowl on a table, putting a light bulb (40 to 60 watt incandescent) and puts a box over it. It seems that he will dry a rough turned bowl in 5 to 10 days….again, weigh the bowl and write it down, watch to see how it is losing water weight.
Rick from the youtube channel RickTurns makes a quick, easy, and very inexpensive drying box for bowl blanks!
Check out Sam’s kiln from the Youtube Channel WyomingWoodTurner
Microwave Treatment for
Drying Wood Bowl Blanks
Another method for drying your woodturning blanks is to use a microwave. I have experimented with this using oak and cottonwood with some good results. Again, weight the bowl to start with….nuke it at 60 seconds 3 to 6 times, again….experiment to see what works for you. Then increase the time to 2 minutes per nuke. Do not let the bowl get “hot” you will literally see steam coming off the bowl.
I’ve done bowl blanks in the microwave that have been finished in one day and I’ve done bowls that I dried over a week or so…… the slower you do it the less likely it will crack! Sometimes I will start the drying process by nuking in the microwave for a day …usually working at night, and then set on the shelf for a week or so……I will usually keep track of the daily weight loss, I write it directly on the bowl or a piece of masking tape on the bowl. I picked up my scale from Amazon, use it all the time ….even when I do some cooking 🙂 I think this one will actually weight up to 100 lbs or so …… if you are serious about turning wood and want to process your own local woods you need a scale
No Anchor Seal or Paint
on Rough Turned Bowl Blanks
All the above drying methods are for naked wood…..no anchor seal or paint.
Drying and Storing Your Wood
Logs Using Anchor Seal
If I cut a log in half, or cut a log so the pith is cut out and I have 2 pieces, I will then usually store the log outside (under a tarp if I can) or inside in an area I try to keep my future log blanks in. These are the pieces that I seal both ends of the log to keep from cracking.
Ends of logs painted with Anchor Seal to prevent checking and cracking
I will even paint or use anchor seal on logs that are 4 foot or longer that I have laying around waiting to be processed. Sometimes I get to them quickly, other times it might be 2 years in which case, as the log is sitting there I will put another coat or two of anchor seal or paint on the ends of the log to keep it from drying quickly on the outside and causing cracks and checking.
Circular Bowl Blank Preparation
Drying circular blanks that are cut from a half log can be treated in a different ways when it comes to drying.
I’m assuming you have half a log, you either use a circle jig for your band saw or you draw a circle on the flat side of the log and cut it on your band saw.
So now lets say you have a 10″ wide bowl blank that is circular shaped and maybe 5″ inches deep. This is how I store these types of blanks. I will apply anchor seal, wax or paint to the outside of the bowl blank, on the 5″ side all around the bowl blank. That leaves 2 sides with no treatment, the 10″ circular top and bottom. Often times one of those will be covered with bark. Feel free to strip the bark if you are not going to make a live edge bowl.
Seal the entire circumference of that bowl blank. That will include end grain and side grain. It will dry, but slowly dry because you have the top and bottom of the blank exposed to air. I am usually not so much interested in drying the piece but more interested in keeping it from cracking and checking. You can store this piece indoors or outside for years. If I have gone to the trouble of cutting a circular bowl blank I usually will store these inside.
Drying Or Storing A
Wood Blank With Stretch Wrap
I also have gotten good results with using shrink wrap or packaging stretch wrap around the outside circumference of the bowl blank. I wrap it several times with the plastic wrap and set it aside to be stored or dried. I have had most of them develop some type of mold under the plastic wrap but when turned on the lathe the mold is gone.
Use packaging wrap or shrink wrap to cover the outside wall of the bowl blank
I’ve checked blanks wrapped with plastic for weight loss and they do lose water weight over time. I think I prefer anchor seal or paint over using the plastic shipping wrap, although, the shipping wrap provides a quick solution to sealing up bowl blanks…..you can always rip it off and apply the anchor seal or paint. If you don’t mind a little mold, go with the plastic stretch wrap especially if you plan to turn it quickly and the wrap is there just to keep it from cracking or checking.
I use the stretch wrap when I cut a bunch of round bowl blanks that I plan on turning over the next week or two. Just so happens that some of them were never put on the lathe and sat wrapped in plastic for a year. These blanks did not crack and lost water weight…..but they grew mold.
Wrap the sides of the bowl blank and leave the flat bottom and top to breath and lose moisture!
Final Bowl Blank Drying Thoughts
There are 2 schools of thought when it comes to turning wood. Turning wood bowls with “dry” wood bowl blanks and turning bowls with “wet” bowl blanks. In either scenario you would like to turn the bowl blank while it does not have any checks or cracks, so treating and storing your wood and bowl blanks becomes a matter of “what works” and it is a priority!
First method, lets say you have a 5 foot log.
You can turn 12″ bowls so you cut 12″+ pieces off the log. If you want 2 bowl blanks, cut off one 12″+ piece. Then get your anchor seal or paint and seal up the fresh cut on the log.
If you are turning the bowl blank wet then you don’t need to do anything except cut a circular bowl blank and put it on your lathe. Turn it and then dry it as you desire. No need to use any anchor seal, wax or paint ……unless you want to preserve the round rough turned bowl blank as it is. If you seal all edges it will probably stay as it is….moisture wise, and will not crack. You can put it on the lathe any time and then dry as desired.
Rough turned wood bowl with wall size 10% of width, no anchor seal or paint, ready to be put away for drying
My Wood Bowl Blank Cracked and Checked
When I first started to work with wood bowl blanks almost all of them cracked and checked so I learned how to turn cracked wood bowl blanks and make repairs. This is really another matter but don’t throw out your bowl blank because its cracked!
Keep in mind however, depending on how bad it is cracked or checked you might need to do the repairs before you turn it so it doesn’t fly apart while on your lathe. Otherwise I usually will turn the piece to rough form, then use CA and coffee grounds, shavings or sawdust to seal and glue the crack together. The cracks can actually make the piece look better 🙂
If you are not familiar with CA glue, here is a CA glue starter kit that will help you get started using CA with your woodturning projects.
Oak wood bowl with cracks filled with CA and coffee grounds.
Oak wood bowl with cracks filled with CA and coffee grounds.
Free Wood and How to Dry It In Your Small Shop
Shawn (I think that’s his name) from youtube channel “worththeeffort” has a couple of great videos on how to process lumber from local trees for woodworking and woodturning. He is a great teacher and explains the concept behind drying wood so that you can understand the reason for the madness of drying wood 🙂
I noticed he recommends coating the end grain in his rough turned bowl blanks before putting them up to dry. Number one, you need to be able to identify the end grain ….#2 I’m not so sure that is necessary. However, its up to you to experiment with drying your wood bowl blanks and what works for you and the wood you are working with.
I will post 2 videos from Shawn’s channel. One he talks about drying in general and #2 he talks about building a kiln from an old broken freezer case. Something I plan on doing soon!