Home Made Wood Lathe Scoop Chuck

Home Made Wood
Lathe Scoop Chuck

I really enjoy woodturning and the longer I’m at it the more cool stuff I find out you can turn and tools you can build. In this article I’m going to show you how to make your own set of scroll wood chuck jaws that will fit any woodturning chuck.

Maybe you’ve had some questions on wood lathe chucks, sometimes called “scroll chucks” such as which one to buy or which would be the best lathe chuck for the money.

Now Using a SuperNova Scroll Chuck

I ended up getting the SuperNova 2 wood scroll chuck, it uses all the jaws that Nova makes ….I think 🙂 I only have 2 sets of jaws as I write this but I’ve discovered that some guys/girls actually build their own custom jaws for their wood lathe chuck.

Turning Wooden Scoops

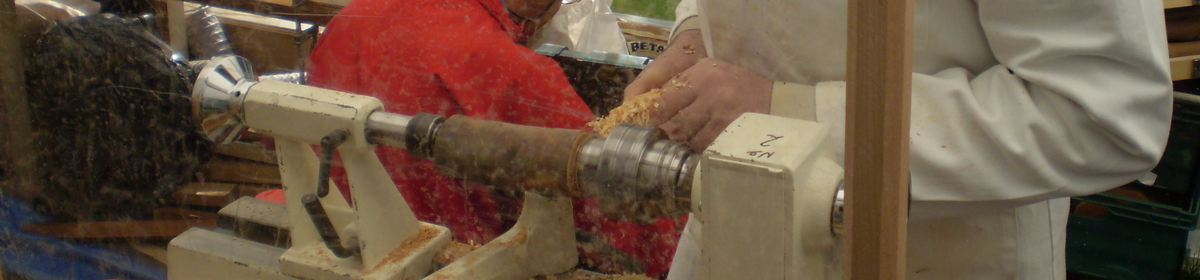
A while back I remember watching a guy turn a wooden scoop. Pretty difficult when you think of it, you have the scoop part and the handle part, both on different axis’s. You could probably make it a 2 piece project, in other words you could turn the scoop and handle seperately and then figure out some way to attach the 2 pieces.

I’ll cut to the chase because I was watching Alan from the youtube channel “As The Wood Turns” and he builds a set of jaws that can attach to your wood lathe chuck and works perfectly for turning the scoop after you have turned the handle.

Video on How to Make A Home Made Scoop Chuck

Watch how to Turn Wooden Scoop with Home Made Wood Lathe Chuck

Here are some of the better comments

This scoop is actually my Vicmark vm120 body with wood jaws mounted to the body. The jaws are made from an 8″ by 8″ by 1/2″ piece of Baltic birch plywood(the good stuff). The standard jaws were used as templates to mark bolt holes. The holes were then counter sunk and stabilized with thin CA glue.

The jaws are attached with bolts a little longer than the standard bolts to allow for the additional thickness of my plywood.

On top of the plywood, I glued 2″ thick cedar since that is what I had available. The wood can be anything stable and readily available. This wood is miter cut similar to a picture frame, drilled for outer bolt access, and glued to the plywood.

The jaws can now be customized to hold the current project. For my scoop, I drilled out the center a little smaller than my scoop bowl and removed two opposing jaws.

When the time comes that I have removed too much of the jaws for my then current project, I can either make a new set of jaws or tool off the cedar and glue on new wood pieces. As with any home made tool, please be careful and use your head. Start slow then increase speed to where you are comfortable then dial back a little. As with any home made tool, you are the sole person responsible for its safety and your own safety.


From Charles
I chose your design because it looked the safest. However when I tightened the jaws, the screws pulled the plywood apart. I tried three different ply woods and had the same problem. Still like the design, would like to offer a suggestion for those folks with a Nova chuck. For $19.95 you can purchase a ‘NOVA 6021 Soft Chuck Accessory Jaw Set” from Amazon and mount your wooden jaws on the jaw set instead of PLY wood. The nylon jaws are made to modify for any configuration you need.

Alan comments:
Let me summarize this discussion for others who read this thread. Charles’ original jaws failed because the screws pulled thru the plywood. He found a great solution with the NOVA Soft Chuck. So he is off and running.

Why did his plywood fail? Not all plywood types are equally strong. Some types are very weak and should not be used.

1. Common fir plywood has few, thick plies and many voids. This should not be used for this project
2. Most Hardwood plywood is similar to fir plywood. The only difference is the outer plies are hardwood. This should not be used here.
3. Hardboard, particleboard or MDF core plywood is heavier and no voids. However, the core does not have the strength for this application.
4. Baltic birch (or other similar names) has many thin plies and no voids. It is significantly stronger than the other woods noted. However, it is still wood and not as strong as aluminum or steel. It was adequate for my jaws but I applied CA to the screw holes and am very careful not to overtighten. Then use only at low speeds and avoid standing in the rotational plane.

If your chuck is a Nova chuck then use his solution.

home made wood chuck scroll jaws

Woodturning Finish Using Stick Fast Thin Cyanoacrylate Adhesive 4-1/2 Ounce Bottle (CA Glue)

Stick Fast Thin Cyanoacrylate Adhesive 4-1/2 Ounce Bottle (CA Glue)

I used to wonder what CA finish was. I watched Cap’n Eddie do some CA finishes and the mystery was gone!

CA finish is basically just using superglue as a finish for your small wood turning products. CA, superglue or Cyanoacrylate Adhesive comes in thin to thick, it can be used for finishes, or fixing cracks or voids …even as a stablizer for soft wood.

You can find CA on Amazon or your local wood working store…. support these guys, I  think the Cap’n sells it too….. www.eddiecastelin.com 

You can learn a lot from Cap’n Eddie Castelin about wood turning, I sure did. He got me through all the basics, now I would like to pay him back by sending some traffic his way. I pay him back by asking people to visit his site, and to visit his youtube account https://www.youtube.com/user/capneddie  for all he has done …. he served our country and taught me how to turn wood…..Making Shavings!

Purchase 4 or 16 ounce CA packages for your woodturning finishes!

I started off buying some CA or superglue from Harbor Freight and Menards. You get little tubes and if you don’t use the whole tube it goes bad fast! Do youself a favor and buy one of the 4 ounce or 16 ounce packages if you plan on using it for finishing some of your woodturning projects.

Testimonial on CA Finishes

I grabbed the below comment from Amazon about CA glue and CA finishes.

CA THIN
By Wayne Edgeworth on Aug 25, 2017

A great product for wood turning. Sets fast and holds strong. I have used this on several lathe projects that had small cracks and it has held strong. It is hard to sand once it sets up, but a light cut with a lathe knife or scraper will take care of that. It does have a strong odor, you may want to use a respirator or a fan. I’d recommend this product.
Safety warning: use in ventilated area, do not breath vapors, wear eye protection, do not get on skin or clothes, if you do get it on your skin just wash off with water. Be very careful because this stuff can get very hot and has a chance to spontaneously combust.

Check out some of the
finishes on these woodturnings!

CA Finish using Stick Fast Thin Cyanoacrylate Adhesive

CA Finish using Stick Fast Thin Cyanoacrylate Adhesive
CA Finishes using superglue or CA Finish using Stick Fast Thin Cyanoacrylate Adhesive
CA Finish using Stick Fast Thin Cyanoacrylate Adhesive
CA Finishes using superglue or CA Finish using Stick Fast Thin Cyanoacrylate Adhesive

Here’s Cap’n Eddie on CA Finishes

You’ll see the Captain at work using CA for woodturing finishes, if you’re new at this you must be confused and wondering “what the heck is CA?” Well, CA is superglue or Cyanoacrylate Adhesive which turns out that it really is more than just glue, you can use it as a finish on wood that looks just awesome.

Please remember to use proper saftey practices when using this finish, use protection on your hands (gloves) and use a proper mask while adequately ventilating your workspace!


Wood Hardener Experiment for Woodturning Bowl Project

Turning a Cherry Bowl and
Needed Wood Hardener

It’s been a while since I’ve added to my woodturning blog …..haven’t been feeling too well so I haven’t been working with my lathe. I’ve been cleaning up and trying to work on my garage roof plans and I’ve spent some time with the prototype’s for my carbide insert woodturning tools. Seems like there are a handfull of options out there if you want to buy a completed set of carbide tools but a full set could cost you anywhere from $400 to $600 dollars. I’m trying to develope 3 woodturning tools made with carbide inserts that will do everything you need and the entire set would cost somewhere around $250…..or about $85 each…. Going to take some time to get the prototypes finished and I might end up creating and selling just 10 sets or so a year ….and at $60 or so dollars…. just to help new turners get started. These carbide tools are really easy to use!

I know when I first started, if I could purchase a carbide tool for 60 bucks I would have jumped on it. I had so much trouble when I first started with Chinese wood turning tools. More on this latter….

Anyway…..I tried a little Wood Hardener Experiment for Woodturning Bowl Project

I had some wild cherry wood that was cut down a couple of years ago. I cut it myself, on my mothers property after a storm, thought I would be using for fireword or for the “smoker”. The logs were about 2 feet long and up to 20″ wide, sitting outside uncovered and no treatment for the ends, that is I did not seal the ends of the log or the endgrain.

The piece I decided to work with was at the above dimensions, it looks pretty good and I split it down the middle and found it to be very dry. I can only turn 12″ on my lathe so I figured I could cut off the outer soft material on the bigger piece and get a nice piece to turn ….looking for a good size bowl.

Next I created my blank and rounded the corners on my bandsaw. I really need to get a new blade so I can cut corners easily. In a perfect world I would have a dedicated bandsaw and blade set up just for cutting blanks!

Mounting the Cherry Bowl
Blank for Turning

I started my project with my Nova 2 Chuck fitted with a worm screw, it seemed to hold pretty good and pulled up nice and tight to the chuck. Next I pushed the tailstock into the other side of the blank and it went in rather easy, in fact, the outer layer was pretty soft in this spot. I decided to press the tailstock in tight and give it a try.

Everything seemed to hold tight. I did not find any more soft wood yet 🙂 So I shaped the bowl, with a tenon for the chuck to be on the tailstock side of the bowl blank. Shaping went pretty good but when I started to shape the blank for the chuck tenon I ran into more of that soft squishy wood! I decided I would finish shaping since I put this much work into it.

I really didn’t want the blank to spin off and hit me in the head, I don’t have a face mask yet, so I’ve tried to turn carefully and slowly.

I tried out my new carbide tools, a square carbide insert and a 15mm round insert, both worked excellently. Then I spend some time trying the get a handle on turning with a bowl gouge. I have a 1/2″ bowl gouge by Woodstock with a traditonal grind… up until now I’ve earned a new name…..”CATCH”, that’s right, I was the captain of catches and I was close to giving up. I thought it was the tool, the lathe and/or the wood but in reality it was just my technique! I’m really surprised a bowl hasn’t flew across the room and/or hit me in the head at some point because I’ve had so many catches.

Tradional Grind for My Bowl Gouge

Well I decided to give it another shot after waiting a couple of weeks. I reground my bowl gouge with a traditonal grind according to many experts, I’ll try to put up a pic. Not only did I regrind the tool, but I put a secondary grind on it for more clearance. As they say, “ride the bevel” seems my tool always got it the way causing me to have a catch or two or 10 🙂

Well, wouldn’t you know. My bowl gouge was cutting as good if not better than the carbide tools. I was “making shavings” as Capn Eddie says, and was that an awesome feeling. I didn’t care what the bowl looked like, all I cared about was watching the shavings fly just like the utube videos I’ve been watching. I had complete control of the side walls, inside the bowl and the outside shape!

Ran Into A Patch of Soft Wood

I stopped to examine my work and was proud of my turning! I finally got a bowl gouge to work right, I have to say it was the grinding on the original tool that probably messed things up, after using the oneway grinding jig I put a more desired grind on the bowl gouge and I could actually make it work. That’s what wood turning is all about. Finding these little changes or techniques that open the door to other methods and surprises 🙂

Usnig Wood Hardener on Lathe wood turning projectWell, as I was looking at the bowl I noticed a section that was off color and soft enough to push my finger through. I thought, great…. finally I turn my first bowl like a pro and its rotten. Then I remembered the soft tenon, it was the same type of wood, white and soft.

Experiment With Wood Hardener

I probably should have thrown it away, but it was my pride and joy. I wanted to hang it on the wall or something but because of the soft wood I was screwed.

I remember watching a video where the turner had the same situation and used a “wood hardener” so I did some searching and found some more info on different wood hardeners and thought I would experiment with my trophy and see if I could get a decent bowl out of it by using this “wood hardener”. I found a “minwax wood hardener” and ANOTHER wood hardener in a pint container at “Menards Home Center”, I know Home Depot has the Minwax Wood Hardener, a google search will give you some other sources for a wood hardener.liquid wood hardener for soft wood

You might think you could use an expoxy? The problem with most expoxies is that they do not penetrate the wood. If you know of an expoxy that penetrates the wood…. I would feel comfortable trying it.

Basically you just soak the soft spot with the hardener and let it dry. It soaks deep into the wood and hardens after a couple of hours. I also found 2 cracks and a chip. So I used some CA glue and poured it into the cracks, inside the bowl and outside the bowl. I also used CA and woodshavings and dust to form a paste to push into the cracks and chips.

I turned the bowl again, the wood hardener I used on the soft wood by the tenon worked great. It has keep the tenon solid and the wood chuck seems to be holding tight. As I turned the bowl the other soft spot turned nicely but after more shaping I found I needed to apply the hadener again.

Is A Wood Hardener Worth It?

You might think, “hey, don’t waste more money and time….throw the bowl away and start again!” I thought that initially but I really wanted to see how well this “wood hardener” works and if I have a bigger project would it be a possible solution should I run into rotted or soft wood? At this point I would said it is definitely something worth trying. It cost about 10 bucks for a pint and I only used, maybe a 1/5 or 1/6 or it ….so maybe I used a dollar or so of hardener. In my opinion, that would be worth the cost if you have an hour or more into the project.

BEFORE Woodhardener was applied, see white soft area in front of bowl
wood hardener applied to woodturned bowl
AFTER wood hardener applied to woodturned bowl

I still think my chinese tools are half my problem when it comes to turning. I’d love to try an American made bowl gouge from D-Way, Thompson or Carter & Sons. All American made, and they seem to slice through wood like butter. Most of the guys doing high quality video turtorials always mention they are using these tools ….in fact Cap’n Eddie was just showing off one of his D-Way bowl gouges with a fingernail grind ….he gives it high praises!!!

Good to see Eddie returning to scene after his health problems!