I’m always trying to learn new techniques, trying to learn how to use and sharpen new tools. Always looking for the flawless finish so I don’t have to get a disk sander out to get my project ready to finish 🙂
I started out my woodturning journey with some cheap tools and the only ones that I could make work were ‘scrapers’ that were ….maybe 3/16″ thick and I thought they would break in half at any moment …especially after some of the nasty catches I would get.
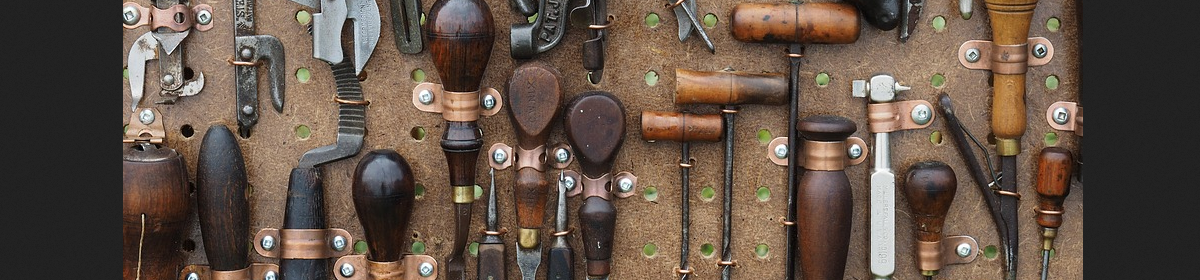
Getting Started With Scrapers
….An Essential Tool
In the beginning I made some homemade tools, some scrapers and some carbide tipped or carbide insert scrapers. I learned to use these and at least I figured out how to shape to a project without injuring myself, breaking the tools, cracking the tool rest or sent tools and project flying across the room!
I enjoy writing, always wanted to be a writer…..so to some of you who think I might be too verbose ….please forgive me 🙂 There is a reason behind my madness in almost all my posts. I always intend to share a lesson I have learned and something that will help you become a better woodturner.
Finally Purchased A Hefty Scraper
I like scrapers, I finally got a 1 1/2″ round nose scraper that’s almost 1/2″ thick, from Hurricane Tools …a 1 1/2″ Round Nose Scraper…every wood turner should have a good hefty set of scrapers. Once you learn how to use them you will have the courage to attack the most unruley piece of spinning wood. You should really get a set of these heavy duty scrapers, they will last many, many years. You will get a round nose, left and right scraper. If I could encourage new turners one set of tools to get it would be this Hurricane Scraper Set.
Learning How to Sharpen and Put a “Burr” on Your Scraper
Well, I started learning about the “burr” on the cuting edge of a woodturing tool, in particular, scrapers. There are many kind of scrapers and I thought you just sharpened them and you would be good to go! Now I find out that I need to have a “burr” or “bur” on the end ot the tool. OK…I figured out what a bur was and I could probably make one ….but which side do you use. Do I turn the burr up so it contacts the wood first or do I put the stupid burr on the bottom …..who knows and what’s worse everyone assumes you know where the burr needs to go.
So, I gave up and figured when the Great Turner in the Sky wanted me to know how all this burr stuff works out and how to use it, it would be revealed to me 🙂
Well…..enter Mike Peace.
A Proper Burr Makes for a Glass Like Finish
Just watch the video and everything regarding a woodturning tool burr becomes clear…. how to make the burr, what position to use the burr.
Bottom line, is that the cutting tool burr will help you make clearner cuts ( I have no idea how it does this) which means you end up with a better project, less sanding and you are now a very fine woodworker.
Mike shares a variety of scrapers and mostly talks about negative rake scrapers. If you don’t know what that is ….don’t worry, you’ll figure it out from the video pictures or his explaination. But this video will get you on your way to learning how to be a better woodturner.
You should bookmark this post or video because you will want to “perfect” this concept….that is, scraping and creating a burr on your tool.
I’ve been turning a lot of ash …not sure if its white ash, black ash or green ash ….most if is dead ash! It’s really ashamed because I had 20 or 30 ash trees on my property …some probably 100 years old or more. Now they are all dead and in varying degrees of decomposition.
I told someone I had was turning an ash bowl ….they asked how I knew it was Ash ….it caused me to think because I just always knew it was Ash. So, I did some googling and checked out youtube. I found a really nice video on how to tell what type of Ash tree you might have.
Most Local Ash Trees Dead
As I said, I can identify some of my local trees but I have a hard time identifying ash trees. Most of them are dead so the leaves are not around to identify.
I found a great youtube video on how to identify Green Ash, White Ash and Black Ash Trees using leaves, bark, and shape. Very good video.
Ash Tree was Mis-Identified
To my surprise I wrongly identified a local tree. A neighbor had a tree go down …maybe about 24 inches at the trunk. I thought it was Beech or maybe Boxelder. My neighbor said it was Ash! The root system failed, the tree just fell down and had all its leaves ….I thought to myself, “no way this is Ash” ….after I did a little more research I am quite certain it is White Ash
Identify an Ash tree by it’s leaves.
Making wood bowls from ash trees A couple of Ash Tree Wood bowls turned from a piece of white ash tree
I always try to collect a leaf sample when I pick up wood for turning. However, if you get a tree limb or stump from a dump …you’re probably out of luck when it comes to finding any leaves.
I like turning ash, its very, very hard …can be used to make tool handles, mallets and the like. I didn’t know how useful it was or how ard it was until I started woodturning. It makes great bowls and vases. Ash finishes nicely, and even the distressed ash (worm holes and defects) look great.
It would be to your benefit to get some Ash and try to turn it. It will further help you if you can identify Ash from a log section when you only see the bark. Keep in mind, there is White, Green and Black Ash …each has a different bark. People marvel at the projects I turn in Ash and I prefer it over Oak.
If you turn an old piece of Ash that is dried ….it will be pretty tough to turn. Yet the results will be pleasing. If you are lucky enough to get a green piece of Ash …it cuts like butter, and is easy on your woodturning tools.
How to Make Your Own
2″ Hook and Loop Sanding Discs
I made myself a little timesaver tody …for cutting 2″ sandpaper discs from a 5″ or 6″ felt backed sanding disk. In fact, you can cut 2″ discs from any source of felt backed sanding paper.
The original idea is not mine, I can’t remember who made one before me but I expanded a little on the idea.
Why Do I Need 2 Inch
Sanding Disks?
You ask, “Why do you need 2 inch sanding discs?”
I Purchased 2-Inch Multiple Grits Aluminum Oxide Wet/Dry Hook and Loop Sanding Discs with a 6mm Shank Backing Pad + Soft Sponge Buffering Pad, 5-pieces Each of 60, 240, 600, 1000, 5000, and 10000 Grits from Amazon a couple of years ago and they served me well.
A couple of years ago I purchased a drill powered (DISC SANDER) it came with a bunch of sanding pads …100 or more and I purchased extras. The sanding disk was pretty good but the sanding pads were garbage. Either the felt on the back of the sandpaper would give out prematurely or the sandpaper would clog up in minutes. You can see the Sandpaper Cleaner …just click on the link …it was only 10 dollars and had everything you needed to get started using a small 2 inch sanding disk for wood turning. I was very happy with it even if the pads wore out quickly and that they were poorly marked. I would recommend it to anyone who wants a quick want to start sanding their bowls and other woodturnings.
Jeteven 2 Inch Sanding Disc 100 PCS Mix Grit Sander Disc Grinding Discs for Drill Grinder
This system will give you a good idea on how to make your own 2″ sanding discs or how to use it more effectively or purchase something you might need to meet your specific needs. I did order a 100 piece set of sanding disks called “Jeteven 2 Inch Sanding Disc 100 PCS Mix Grit Sander Disc Grinding Discs for Drill Grinder” these satisfied my needs for the moment at the time and I still have some left, they were marked for size (grit) but they had the same problem, backing did not last too long on some, lasted forever on others …same with the grit, some lasted a long time, some clogged up and with some cleaning lasted a little longer. It doesn’t matter what type of sandpaper you use, you should invest in a rubber cleaner for sandpaper like this one on Amazon https://amzn.to/2OvSieN
SKATECO Belt and Disk Abrasive
Cleaning Stick (8-1/2″ 2-pack)
This is one of the best deals I have found for cleaning any type of sandpaper and getting a 2nd, 3rd or more life out of your disk sander, belt sanding …really, anything with a piece of sandpaper ….works like magic most of the time and you really need to get one….especially for these little 2″ sanding disks. It is like a big sandpaper eraser.
—Increases the life of sanding belts and disks by removing residue —Works to clean dirt and grime off of grip tape —Natural rubber material works to remove residue off of abrasive surfaces
Back to the 2″ Sanding Disk
Although this mandrel and sanding pad work great in a cordless drill or corded drill, I think I am going to try a air powered random rotation 2″ orbital drill from Harbor Freight…..but that’ another story 🙂
Needed Some 2 Inch Sanding Pads
So one day, I needed some 80 grit sanding pads …I was all out. I grabbed a 6″ sanding disk from my orbital sander and cut a couple of 2″ sanding disks. To my surprise they worked perfectly and lasted 10x longer than the sanding disks that came with the kit and the extra disks I purchased.
Cutting 2 Inch Sanding Disks With Scissors 🙂
So, I’ve been cutting sandpaper circles by hand. It’s pretty rough on scissors. I wrecked a pair of awesome scissors, I tried sharpening them but they had some serrations and other shapes ….just couldn’t make them work like new.
Maybe Gasket Punches Would Work?
I looked up punches, gasket punches on Amazon and Google ….a 2″ punch cost anywhere from $150 to $200, unless there is a better search term I could not find anything cheaper. So, buying a punch wasn’t the answer. I think I will have to make my own 2 inch sandpaper punch.
After seeing the post in our woodturning facebook group from someone having the same problem I started looking around to see what I had that might work.
Make your own 2 inch sandpaper cutter from a piece of 2 inch EMT or electrical conduit
I found some galvanized 2 inch water pipe, looked too thick to mess around with ….I thought I had some 2″ copper water pipe laying around but I couldn’t find any. I ended up digging up a piece of 2″ thin walled electrical conduit. The inside diameter was someplace around 2 1/8″ not sure exactly what it should be because it was a little beat up.
I cut off about 6″ of the 2″ EMT with a grinder, sawzall or hack saw would have worked. I took the piece to my grinder squared off the end I wanted to sharpen with the miter guage.
PICETURE OF SQUARING OFF IN GRINDER
The other end of the pipe was a factory edge so I had to pound out a ding to get it back to circular shape and I was good to go on that end.
I had about a 60 grit piece of sandpaper on my 12″ sander, set the miter guage as far as it could go and started to put a bevel on the edge of the side that I squared up. Once I got a good bevel on it I took it over to a smaller sanding disk with a 100 grit wheel and started putting a sharp edge on the bevel.
I had a nice edge but I then took it to a 150 grit belt sander and finished the edge ….nice and sharp now!
The inside of the pipe at the sharpened end had a nice big burr on the inside, I tried to file it down and ended up using a Dremel tool with a little sanding drum on it. I removed the burr perfectly and the inside was nice and smooth. However, now there was a burr on the front….I resharpened, removed the burr from the inside and resharpened the outside again with a file and diamond hone.
Next I wanted to make a cap for the top of the conduit. Not necessary but I was having fun 🙂
I found about a 4 or 5 inch wide piece of ash and turned it to round. I hollowed out a small opening in the bottom, about 1″ deep and then I used my parting tool to create a recess for the pounding end of the pipe to slide into. It worked perfectly. I finished sanding and shaping it, I rounded off the top a little.
Last steps involved sticking the cap in the chuck and I sanded some more and applied some of Capn Eddie’s OB Shine Juice. I like using this fininsh on my tools, easy to repair or apply another coat if necessary but it protects the wood and takes a beating.
One more step….I epoxied the Ash Cap to the pounding end of the new 2 inch punch. I tapped it a couple of times with a big heavy wood mallet, keeping the cutting edge on a piece of wood. Looks like a thing of beauty ….if I had nothing better to do I would paint it and put it on the shelp to look at 🙂 ………but, it will be used a lot!
I tried cutting some 2″ pieces of sandpaper and it worked great, I thought it should cut better so I took the pipe over the my grinder and reshaped the cutting edge, gave it a double bevel …kind of like on a bowl gouge. I had to get rid of the burr again but this time it cut the sandpaper like butter.
In fact, I didn’t even have to use a maul or hammer on it. I just put my palm around the wooden top and twisted the cutting tool on the piece of sand paper and ended up with a perfect 2″ piece of sandpaper.
If you make one of these I imagine you are going to have to find out what the best cutting edge is for you and since it isn’t tool steel you will probably dull the edge quickly. But, I’m sure you can get 12 or more sanding disks from one sharpening. ….either way, much better than using a pair of scissors 🙂
Using Your Sanding Disk Cutter
One final thing to remember. When pounding out your 2″ sanding disks make sure the sandpaper is on a piece of wood, 2×6 or some log cut off. Make sure the piece of wood is on something stable ….I”m not sure a work bench would be solid enough. Try putting on a concrete floor, concrete block…..I even cut out a few with the wood on my lathe rails …probably not the best way if you are going to be whacking it….but good enough if you are just hand twisting.


 the inside was nice and smooth. However, now there was a burr on the front….I resharpened, removed the burr from the inside and resharpened the outside again with a file and diamond hone.