I had a tree guy drop off some maple for firewood. I have some room at my house so every now and then a tree guy will dump a load of wood! Lucky me 🙂
I split most of it and do some treasure hunting on the pile before I start splitting the wood. I found a few nice pieces I though would make nice bowls and vases. Truth be known, if I had my way I would probably save every load of wood that got dropped off for turning….. of course I would have to turn 1000’s of bowls or my wife would be a little upset that it was cold in the house 🙂
Natural Edge Wood Bowl Video
I have 2 videos for you. The first one is just a series of stills that I narrate and the next video is an edited video of me turning a natural edge bowl from the maple wood blank.
Turning a maple live edge or natural edge wood bowl.
I have an excellent digital slr camera, but need to figure out how to get some really nice and clear video. This will do for now but I will upgrade soon.
I wanted to turn a live edge bowl or as some call it a natural edge bowl. That would be a bowl with a bark edge or natural edge of the piece of wood for the top edge of the bowl. This is one woodturning project that I’ve been wanting to do for a long time!
I experimented with a piece of Maple that someone dropped off for firewood. I burn all kinds of wood, anything really, in my wood stove and that’s how we heat our house for the winter. Been doing that for 30 some years now.
Maple log cut into a bowl blank, ready to be attached to a faceplate and will be turned into a live edge or natural edge wood bowl.
Natural Beauty of A Natural Edge Bowl
The funny part is both my wife and I will always look at a piece of wood and wonder what’s inside, what does it look like. Only recently did I get a Laguna 14″ SUV bandsaw with enough horsepower to rip throough some of the wood, and it’s all I can do to keep myself from dragging all the firewood into the shop to cut it open. It’s kind of like a God secret. Looks like firewood from the outside but underneath all that is a diamond worth shining and keeping.
This led me to desire 2 different types of machines to work with wood. I really want one of those portable bandsaws that allows you to cut a log into useable lumber. Same thing, rip open a log and it’s like a piece of heaven.
Haven’t gotten the portable bandsaw yet, but I did get a wood lathe. Which was next on my list of desired woodworking toys …I mean tools 🙂
Getting Started In Woodturing
I’m not sure how or why I got interested in turning wood, I haven’t been a woodturner since highschool and I barely remember that. I don’t think I even read anything about woodturning. Maybe I watched a youtube video or something. Whatever it was, I caught the woodturning bug!
Big problem though, I was …stil am, pretty broke from being sick for a long time. I couldn’t afford a $1000 for a lathe, much less $4000 or $5000 for a good lathe.
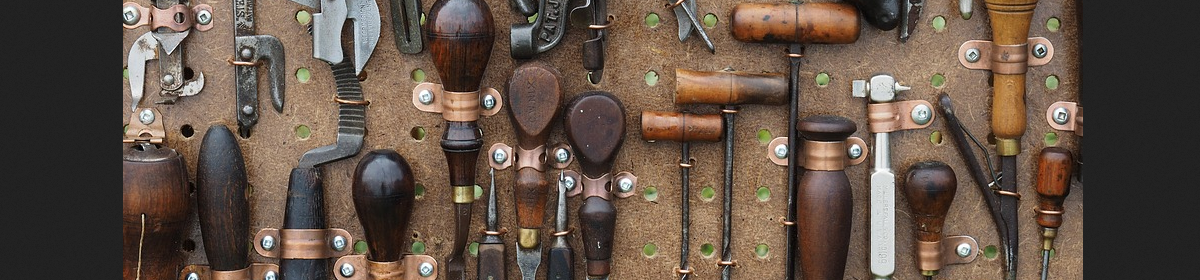
I went the China route. Got some basic equipment from harbor freight, just had the lathe and some HF woodturning tools. I had a faceplate and centers that came with the lathe. That’s basically how I started and learned woodturning.
Live Edge Bowl Experiment
Sorry, not sure how I fell down that rabbit hole. I really just wanted to share some quick facts and pictures of doing a live edge and the experiment I did to keep the bark in place.
Turning a natural edge wood bowl, mounting on wood lathe.
First mistake I made was I used a faceplate on the wrong end and I ended up with screw holes in my live edge bowl. I’m really getting tired of screw holes showing up in my projects, not sure why I can’t keep that part of it straight 🙂
Anyway, I cut a round blank from the maple log and mounted it on my large faceplate. It was a pretty big piece, as big as my lathe could handle, about 12″. It really helped using the circle jig on the bandsaw to cut the blank round and allowed me to make the biggest bowl possible. And….the lathe didn’t walk across the floor 🙂 I really need to show you a picture of this circle jig for the bandsaw, like most things I do …. it was a quick bugger job, but it works perfectly!
****************
I had some new woodturning tools I was trying and the project took shape fast. My natural edge bowl was starting to take shape. Then it happened. Totally my fault, I stuck my Sorby bowl gouge a little too hard into the live edge, that is the bark, and a huge piece went flying! Man, I was so disappointed. Everything was going so good and the bowl actually looked great. Now it was missing a huge piece of bark.
Well, I didn’t swear. I prayed that I might find the piece of bark and God answered that prayer because I found it immediately! Normally, I would have cussed up a storm and thrown some tools around and maybe even kicked the lathe ….yep, I have a little bit of a temper. Guess they call that “Anger Problem” these days 🙂
Another Bowl Turning Experiment
With A Live Edge Bowl
I found the piece of bark and figured this was going to be another one of my experiments because I never saw anyone attempt to repair a live edge or natural edge bowl and then finish turning it. I’ve seen some woodturners attempt to do a natural edge bowl and have the bark fly off …at that point they trash the project or just turn a regular bowl.
Repair Of A Natural Edge Bowl
I took the piece of bark that broke off and epoxied it to the bowl edge. I used a 30 minute 2 ton epoxy and let it dry overnight. I figured the real test would be if I could finish turning the rough out of the bowl. After 24 hours I turned on the lathe and bravely stuck my round insert carbide homemade turning tool into the spinning bowl, slowly, every so slowly it started to cut the bowl and bark.
Much to my surprise the piece I epoxied in place held fast. I was able to turn the bowl and finsh the rough out of the natural edge maple bowl. However, the bark was coming loose in some other areas and it looked like it wasn’t going to stay on.
I should have tossed it at this point, but I enjoy fixing things and doing things that others won’t do. So I thought about the different ways I might keep the bark on. I saw one guy use 2 ouces of CA glue and that worked, a little expensive I thought. This wasn’t a special piece of wood and I did not want to waste my CA glue on the bark of a maple bowl.
Alumilite Epoxy Finish
Then I remember seeing someone use “alumilite” to coat a big bowl for a sink. Then he used it for some of his other bowls for a nice glossy finish. Looked like some awesome stuff to finish woodturing projects with, but I found out latter that it required some special effort and there was definitely a learning curve if you wanted a perfect finish.
To keep the bark on the roughed out live edge bowl I used an epoxy resiin like “alumilite” to seal and glue the bark to the bowl. (I used an epoxy resin called Max Clear) I went down into the bowl on the inside and outside with the epoxy.
I purchased some epoxy resin called Max Clear, similar to alumilite from Amazon. I applied a good thick coat to the bark and an inch inside and outside the bowl. The thought was to use the epoxy to hold everything together, that is to keep the bark from seperating and when the bowl was to be finish turned ….hopefully the narrow live edge would hold and keep the bark in place. At this point I was thinking that I would epoxy the entire bowl after the final turning of the live edge bowl.
Epoxied Live Edge Bowl Sat For a While
My natural edge bowl project ended up sitting for longer that I planned. The bark edge along with a small part of the inside and outside top of the bowl was epoxied and thoroughly cured. However, it was wet wood when I started and it moved pretty good with the grain as it dried over a couple of weeks, so it was a bit oblong . My bad….I should have stuck it in a bag of shavings …but, that’s my life. I get sick and sometimes can’t make it out to the shop for days or weeks…sometimes a couple of months. The bowl still had the recess for the Nova Chuck ****** although a little out of whack, I was able to chuck it back up to the lathe.
The bowl didn’t crack though, and the bark was nice and glossy. I chucked up the bowl and started gouging out the inside. I really wanted a live edge bowl, a thin live edge bowl. I wanted to get the sides and bottom down to a 1/4″ or so. This was an experiment so I didn’t care what happened, if it exploded…so be it! I thought for sure the bark would fly off and the bowl would crack.
Epoxied Natural Edge Bark
Bowl Held Together
Much to my surprise, as I pushed the 5/8″ bowl gouge into the bowl, the bark held together! In fact, I used a couple of different tools to shape the natural bark edge of the bowl. I used the big 1 1/2″ scarpaer, the small 3/4″ scraper and the round carbide insert scarper tool. As I shaped the inside of the bowl the bark stuck togeher perfectly. Then I went to the outside and had to really rework the outside of the bowl because of the shrinkage, and once again the bark of the natural edge maple bowl help together perfectly!
This scraper can give you confidence, just enter the wood slowly and make gentle movements and you can clean up just about anything or even shape the entire bowl. Great for newbie and expert alike! I always turn to this big piece of metal when I’m not sure of using the bowl gouge and don’t want to screw something up 🙂
Not a piece of bark fell off the bowl. I got the top of the bowl thinned down to 3/8″ or so, I was OK with that. I tried to do some shaving cuts on both outside and inside. That worked out good, in fact the project was a huge success!
Then it happened!
Live Edge Bowl Disaster!
I had the speed up. I’m still a little paranoid with high speeds on the lathe. I feel like I need one of those bubble suits 🙂 I wanted to see if I could clean up the bark edge of my live edge bowl so I grabbed my bowl gouge ****** with the ellsworth grind, really need the practice with this, and I clumsily jabbed at the turning bowl! To my horror, I saw pieces flying! My project, almost a perfect natural edge bowl ….finished for all intensive purposes was getting destroyed because I was being anal. This time I swore, threw stuff, and kicked stuff…. hurt my toe with the ingrown toenail. I was so so so so pissed at myself! Why couldn’t I just leave well enough alone 🙁
But….
Natural Edge Bowl Saved From Disaster!
I must have been seeing things because the bark was all there except for a tiny, maybe 1/4″ piece that was missing. I thanked God for saving my bowl and asked for forgiveness for being such a jerk 🙂 At this point it was about 3 am. I should have quit at aleast an hour ago, but I was having fun making shavings, turning a bowl and experimenting on how to save a live edge bowl. Yep, I was really enjoying making a mess of things, fixing things, making some shavings and doing some sanding.
I sanded my bowl down to about 600 grit usinng a 2″ disk sander ****** with velcro sanding pads. They don’t last too long but I tried to use a piece of sand paper and the live edge almost took my hand off. Tried sandpaper again, worked for a while but anytime I got next to that live edge or natural edge of the bowl, the bark would grab the paper and rip it from my hands and almost take my hand along with it.
So I used the 2″ sanding pad on my electric drill. Tried it first on my cordless drill, but didn’t feel right and I really don’t want to burn up my DeWalt cordless drills, so I used an electric drill. Beware, caution …..using a corded drill is dangerous when you are around the lathe. Any mishap could cause the drill to get caught in the lathe and make a mess of everything including you!
Sanding A Live Edge Wood Bowl
So, I sanded the natural edge maple bowl starting with 80 grit down to 600 grit. The paper got ripped up when I got next to the bark edge but it worked on the rest of the bowl and to sand down to 600 grit for me is a milestone. I hate sanding, but….. sanding makes the finshe. Ask Cap’n Eddie about sanding. He preaches the need to sand down to 1000 or so and says you just got to do it, otherwise you will have an ameture finish on your bowls and woodturning projects.
How To Finish a
Natural Edge Wood Bowl
Maybe I should say, what kind of finish should I put on my live edge wood bowl. Remember the bark already is finished with Max Clear epoxy resin, similar to alumilite. So, the bark is glossy. I originally thought I would use the epoxy on the entire bowl, however, after using it on another project I can see that it requires some thought, effort and work to look good. This is the stuff that is put on table tops or bar tops and people will inlay pictures, shells or other objects and put multiple layers of epoxy over it.
After thinking about it, I thought I would save my epoxy finish for a special project. In fact, the stuff I have is food safe. It could be used for cups, bowls or mugs. Although this bowl is turning out nice, not sure I want to put in the effort to finish it with epoxy.
So…..
So, I decided since I sanded it down to 600grit, filled all the screw holes and had my life edge bowl looking pretty good. I thought I would use my “Salad Bowl Finish” by General Finishes. I really love this stuff. First of all, it’s advertised as being “food safe”, and although I have said it multiple times before, I’ll say it again. I think all finishes are food safe as long as you allow he finish to “cure” not “dry” but cure. That means the chemical processes are complete. But you do what you feel comfortable with.
I like the “Salad Bowl Finish” because you can apply it to the project while on the lathe and you can spin the project and use a wadded up paper towel to push the finish into the wood and to buff it. I found that you could get away with one coat on some woods and up to 3 coats with others. I think this live edge maple bowl will require 3 coats, the end grain seems to soak up the finish as fast as I put it on, but after one coat it might just seal the bowl and allow the other coats to build up and protect the bowl.
I’ve almost been using the salad bowl finish exclusively on my bowls. It looks great, builds up and has a shiney luster to it …and as they say, it’s food safe.
Some of my bowls I applied “ob shine juice” as a finish, a couple of coats. I’ve also used straight clear shellace and on a couple I’ve applied a sanding sealer first, you need to find a “clear” sanding sealer and then I have applied the “salad bowl finish” over these. So far, the finishes have all worked out great, applying the sanding sealer or ob shine juice keeps the salad bowl finish from soaking into the wood and allows you to get away with 1 or 2 coats of “salad bowl finsh”. At least that’s what I found!
Turning a maple live edge or natural edge wood bowl.
So, up to this point I have one coat of salad bowl finish over the bare wood. I think for the live edge bowl, I’ll end up with at least 3 coats of “salad bowl finsh” and then, it will be ready for a Christmas Gift!!!++++++
Natural Edge Bowl Redone
Looking back, my biggest mistake was the way I attached the bowl blank to the lathe. I used a faceplate on the flat surface of the log. I should have used the worm screw and mounted the log with the bark facing the lathe motor and attached with the worm screw. Or, I could have flattened out a spot to attach a smaller faceplate to the bark side of the log. Or, I might have been able to use a forstner bit to drill a recess for the Nova Chuck in the bark side.
Turning a natural edge wood bowl, mounting on wood lathe the Wrong WAY!
Once attached I could turn between centers and cut a tenon or recess on the flat side of the log. Come to think of it, I probably should have just drilled a 2″ recess on the flat side and mounted it in the chuck and that would have been the bottom of the bowl.
I guess there are many different ways to approach a project, you need to do what works for you. Do what you feel safe with and then experiment a little!
Live Edge Bowl, Live Edge Bowl Blanks, Live Edge Bowl How To, Live Edge Bowl Lathe, Live Edge Bowl Turning, Live Edge Burl Bowl, Live Edge Salad Bowl, Live Edge Wood Bowl, Live Edge Wooden Bowl, Turning A Live Edge Bowl
Finishing A Natural Edge Bowl, How To Make Natural Edge Bowl, How To Turn A Natural-edge Bowl On A Lathe, Making A Natural Edge Bowl, Natural Edge Ash Bowl, Natural Edge Bowl, Natural Edge Bowl Blanks, Natural Edge Bowl Finish, Natural Edge Bowl Greenwood, Natural Edge Bowl Images, Natural Edge Bowl Instructions, Natural Edge Bowl Turning, Natural Edge Cherry Bowl, Natural Edge Oak Bowl, Natural Edge Walnut Bowl, Natural Edge Wood Bowl, Natural Edge Wooden Bowl, Natural Edge Wooden Bowls For Sale, Rough Turn A Natural Edge Bowl, Sanding A Natural Edge Bowl, Sanding Natural Edge Bowls, Turning A Natural Edge Bowl, Woodturning A Natural Edge Bowl, Woodturning Natural Edge Bowl
Different Methods of How
To Sharpen Your
Woodturning Parting Tool
As a woodturner you need to know how to sharpen your woodturning tools. It can be a bit intimidating at first but after some practice, you’ll get the hang of it. I found a couple of good videos that talk about sharpening your parting tool and thought it might help you get the best use of your thick or thin parting tool.
I jokingly but seriously talk about my Chinese Tools, my first set of woodturning tools. I’m glad I purchased them now because I used them to help learn how to sharpen woodturning tools. The fact is, you grind down a lot of steel before you become very effective when sharpening your woodturning tools and, might as well use up cheap steel instead of a $100 woodturning gouge.
I found this video by Sam Angelo, he has some excellent advice on how to sharpen your parting tools and spends a few minutes showing us. I really enjoy Sam’s teaching and will share his material where appropiate. In other words, sometimes its hard to find what you need on youtube, I hope to create categories on my blog that will help you to quickly find the information you need regarding woodturning. I find it difficult myself to find the information I need, for instance, I watched some of Cap’n Eddie’s videos on sharpening and I know I saw a video on sharpening and making a parting tool ….but I can’t find it. So, my webdesign and seo experience will help me with my passion, woodturning, and help you by making the information you need regarding woodturning easy to find.
I recently wrote an article and made a video on how to make a parting tool for woodturning from a sawzall (reciprocating saw) blade, what I did not cover was how to sharpen the parting tool. Sam does a better job than I, it’s really very simple but will greatly increase the efficiency of your parting tool.
Maybe you don’t want to make a parting tool. I have purchased Sorby Woodturning Tools and they are of very high quality. You can purchase the one below for under $30 and if you purchase through that link I will make a small commission…. really small commission, but that’s how I pay for keeping my website up and the tools I need to keep it going. So I appreciate your help!
How To Sharpen Parting Tool, Sharpen A Parting Tool, Sharpen Lathe Parting Tool, Sharpen Parting Tool, Sharpen Parting Tool Metal, Sharpen Thin Parting Tool, Sharpen Wood Lathe Parting Tool, Sharpening Parting Off Tool, Tormek Sharpen Parting Tool
I really enjoy making my own woodturning tools, if for any reason, just to see if I can do it! So I thought I would make my own parting tool for woodturning.
I’ve made a couple of turning tools with carbide cutters, and some with HSS cutting blanks, all turned out to be very useful. It’s very rewarding for me to make my own tools…. although, there’s nothing like an expensive bowl gouge made with the best metal and sharpened properly.
I had a parting tool with my cheap set of chinese tools. It was about 1/4″ wide and works well, even if I have to sharpen it often. But I needed a thin parting tool for my woodturning projects and something that I could hold in my hand. I was looking for a parting tool with a 1/16″ to 1/8″ blade and found a couple out there costing anywhere between 20 and $30 dollars.
Sorby Parting Tool
Sorby makes a really nice parting tool and I probably would have purchased it if I didn’t get the urge to make my own parting tool. I remember watching a capt’n eddie video about making a parting tool http://www.woodturningbasics.com/make-your-own-parting-tool-diy-parting-tool-plans/ so I thought I would try it mysyelf.
DIY Parting Tool Marterials
I used an old Lennox Sawzall or Reciprocating Blade for the blade of my wood lathe parting tool. I must have throw a couple hundred of those away throughout my lifetime. My wife gives me a hard time about saving stuff, I think I thru a whole box of old blades away thinking I would never sharpen them or use them again….. never fails, as soon as you throw something away you figure out you need it!
Double Angle Sorby Thin Parting Tool
I shaped the end of the blade like the Sorby Parting Tool, double angle look. I then cut the end of the blade off to square it off and I cut and ground down the teeth.
Next I took the blade over to the disk sander and ground it down to bare metal. I got it looking nice and shiney, looked pretty good. Since I’m not a metal guy, I was starting to impress myself 🙂
Making Handles For DIY Parting Tool
I cut some 1/2″ handle halves from some Catalpa Tree wood I had laying around that was pretty dry. The stuff is hard as nails. I then traced the location of the blade on each wood handle half. Then I took out a sharp chisel and chiseled out the traced area on both sides so the blade would sit in the chiseled out area and the wood halfs would meet together flush.
You want to chisel out the handle a little deeper than the blade thickness to allow for some epoxy to get between the blade and the wood handle on both sides. I think I used a 30 minute epoxy to glue the handles together. You can get 30 minute epoxy …yep just click on that link or check out your local big box store.
Make sure you clamp up the handles nice and tight, wipe off any excess epoxy that oozes out from the handles being squeezed together. Its easier to clean it up now that after it gets hard.
Attaching Handles to Your
New Woodturning Parting Knife
I followed the steps above and then took the clamps off. It looked good and I probably could have gotten away without having to add rivets to the handles. But, I thought it would look cool with some brass riviets. You can buy special rivets from knife making suppliers, there are 3 different types, check out the video I put on at the bottom of the article on Make Your Own Parting Tool at the end of the page.
I’ll talk a little more on rivets a little latter. First I wanted to talk about drilling the holes for the rivets. I used a 1/4″ brass rod, think I got it from Home Depot or Menards. So after I took off the clamps I laid out [3] 1/4″ holes to drill through the wood handle, through the metal blade and out the other wood handle half.
Like I mentioned before, I’m not a metal guy. Just learning this stuff 🙂
Drilling Holes In Your New Parting Tool
I guess that sawzall blade is hardened steel, so….. drilling through it was a real pain! I couldn’t start with a 1/4″ drill bit…it went through the wood but stopped dead when it hit the steel blade. I ended up starting with a 1/16″ drill bit and had to use cutting oil, had to use cutting oil with each size increase of the drill bit and it kinda trashed the wood handle!
So, if you’re gonna do this and you are really anal about what it looks like, you had better predrill the steel so you don’t mess up the wood handle. I know that’s what I’ll do next time.
Next I cut the brass rod about 3/16″ longer than the thickness of the handle. I put some epoxy on the brass pins and in the holes of the handle. Then I used the smallest hammer I could find to ping the brass rivets on both sides. I really needed a small ball peen hammer …never really knew what those things were used for …got a good idea now 🙂
I did pretty good, but got carried away and cracked the handle on both sides on different riviets!
You really don’t need to smush out the brass rivets that much because you’ll take the handle to a belt sander or a disk sander and sand down the handle and the soft brass rivets. So, that’s what I did. I just used the disc sander to round off the edges and flatten the flat of the handle. Then took it to my 1″ belt sander and further shaped it.
I took some 120 grit sandpaper and then 220 grit to it, got it nice and smoother and put a couple coats of clear shellac on it.
The only thing I had to play around with was the top and bottom angle in the front cutting edge of the parting tool. As I write this, I can’t remember what the angle was….will have to come back and let you know latter. I just keep trying until I found something that cuts well.
That’s about it.
My DIY Parting Tool doesn’t look like it came from a factory but from someone’s shop….my shop!
I can’t tell you how satisfying it is to make the tools. Not sure why. I have designed and built multimillion houses, strip malls, factories and some pretty big and expensive room additions ….I get more satisfaction out of making one of these tools that actually works than any of those big projects.
Here’s a quick video I did …just made of some still pics with my narration, I think its about a minute or so but will give you an idea of what and how I make my own parting tool 🙂