Hollowing Problems When Turning Wood

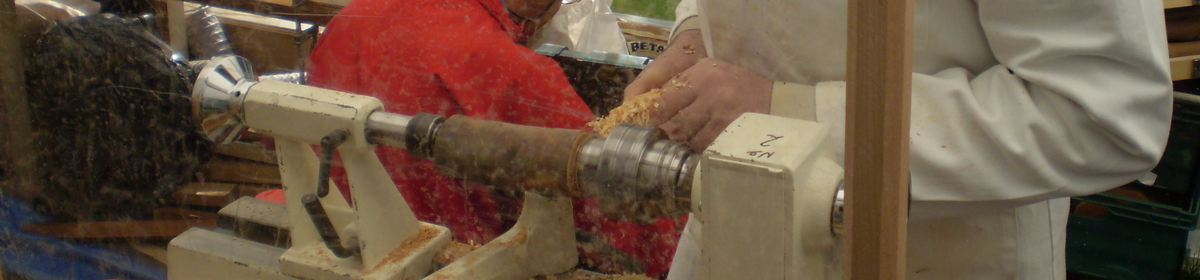
Woodturning Hollowing Problems

I wanted to share a post I made about hollowing problems in our facebook group called Woodturning Basics. This is what our member Pedro had to say:

I must be doing something wrong while I’m hollowing out a cup.
I got a forstner bit to get it started, but even then it’s taking hours to hollow out a small maple cup. The only thing that does a good job of hollowing it, is my parting tool. Everything else catches badly including my $100.00 bowl gouge (that was recommended I use and it’s basically useless. Damn thing catches on everything.)
So, anyone have any suggestions?

Hey there Pedro ….I feel your pain my friend!

Pedro’s Problem with
Hollowing A Wood Cup

When I first started, I turned a little candle holder. Then I did a cup. I had no idea what I was doing and trying to hollow out the cup just about killed me! I tried all my famous harbor freight turning tools ….that’s all I had …spindle gouge, roughing gouge, scraper, parting tools, a really small gouge of some kind ….I ended up hacking the inside out with a small round scraper …..the thing was extended 4 inches into the up ….diaster waiting to happen 🙂

I got it done though.

Learning by myself, it took a while to figure out what tool is supposed to do what ….and then trying to make the tool do what its supposed to do is another story. But hollowing was always a nightmare!

Some Thoughts on Your Hollowing Problems

I had a couple of thoughts on your hollowing of the cup problem. You drilled it and then tried to use a bowl gouge to finish the hollowing …correct?

You say you have an expensive bowl gouge and all you get is catches? Are you pushing into the cup, entering from the top of the cup toward the bottom and then across the bottom?

I wonder what size your bowl gouge is? Minium for me is 1/2″ or 5/8″. If you are using a fingernail grind, you can cut down the side but as you move across the bottom you will catch. You need a standard grind if you are trying to use a bowl gouge ….even then, a bowl gouge is tough to do end grain hollowing.

Use A Pull Cut When Hollowing

I WOULD NOT use a push cut into the cup, you could try to pull the gouge across the bottom using tip, and then use the bottom tip/wing to pull up the side of the cup ….kind of a scraping cut for hollowing a cup. You just need to get the feel of it ….but it can be done.

Scrapers for Hollowing
Woodturning Projects

Better yet is to use scrapers for hollowing your woodturning projects.

I get as much out as I can (after drilling) with a gouge and then I use scrapers to finish up the hollowing.

One of the easiest methods to hollow is to use carbide tools. Use a 1/2″ or 5/8″ bar with a 1/2″ or 5/8″ carbide cutter mounted to it. You can make it yourself or you can buy one already made, carbide hollowing tool!

How to Prevent Catches When Hollowing

Carbide cutters take some time to learn how to use, but once you get it figured out you will be amazed at how easy it is to hollow out a cup, vase or bowl using one of these cutters. Just don’t try to hog out too much at once, learn to take light cuts and you will avoid catches. Also the postion of the scraper, being 90° off of the tool rest and then lifting the handle a little will prevent catches dramatically!

Using Tradional Scrapers for Hollowing

Along with carbide scrapers you should consider getting at least one big scraper. I have a Hurricane Scraper 1 1/2″ wide …almost 1/2″ thick round nose scraper. At https://amzn.to/2oQBmVB. The reason you want a big scraper is so you can extend it over the tool rest a good amount and still keep control of your cuts. I imagine part of your problem is that you are trying to hollow out a cut and have your tool extended 3 inches or more over the tool rest (disaster waiting to happen)  I’m just about ready to purchase a right and left side round edge scraper …you can see what I’m taking about here https://amzn.to/2Nt0T51 these are used inside a bowl or cup and outside of the same turning project.

So, for hollowing out projects get some good scrapers. Yes, spindle gouges work better on end grain but when it comes to hollowing ….you need some specialized tools. You can make these or buy them. One of the members in our group runs Yufutol, you can pick up an extra discount ….make sure you get a full size tool unless you are doing really small projects. https://amzn.to/2NndAhN

Make Your Own Hollow Tool With Carbide Cutters

Or just buy the carbide cutters ….this is what I did. Mount the cutter on a big cold steel bar. I keep one bar with a 5/8″ cabide cutter, I use this all the time. Over time I have learned how to use it …initially you will get some catches but you will learn the angle of approach and how to gouge out and how to finish cut with this one cutter. It actually becomes fun once you get a handle on it …..you just need to press on, practice, practice, …screw up, catch here and there until you master the process. At one time I thought I would start going by the name of “Catch” ….so I know how you feel 🙂

make your own carbide woodturning tools
You can make your own carbide woodturning tools CLICK IMAGE to see cutters

Big Bar For Hollowing

The reason why you want a big bar is so you have some control and stability as you extend the bar over the tool rest. The bigger the bar, the further you can safely extend the tool over the tool rest. I’m thinking of making one of these carbide cutter tools with a 3/4″ bar ….just so I can have more control.

Consider A Hollowing System

Once you get into hollowing large vases, hollow forms etc …you need to think about getting a hollowing system. Just google “hollowing system” and check the same thing on youtube and you will see what that’s all about.

As I think about your problem I wanted to mention something about the tool rest. You should be at the middle of the turning with your tool, not the tool rest….but you want to tool to hit the center of your turning. You want the tool rest as close as you can to the surface you are cutting. This means, if possible, stick the tool rest into the project your are trying to hollow out. Otherwise you are left with a tool that hangs over the edge by a lot ….thus the need for a hefty scraper, whether round nose scraper or a carbide cutter on a big bar.

I’ve been just thinking out loud …hope some of that makes sense.

Again, just keep at it.

You’ll get it figured out. When you get into trouble, keep posting your problem and maybe we can help further.

As I answer questions, I learn myself ….you will too. As soon as you get it figured out you’ll be sharing your wisdom 🙂

Make Your Own 2 Inch Sanding Discs

How to Make Your Own
2″ Hook and Loop Sanding Discs

I made myself a little timesaver tody …for cutting 2″ sandpaper discs from a 5″ or 6″ felt backed sanding disk. In fact, you can cut 2″ discs from any source of felt backed sanding paper.

The original idea is not mine, I can’t remember who made one before me but I expanded a little on the idea.

Cutting 2 inch sandpaper discs for sanding wood bowls

Why Do I Need 2 Inch
Sanding Disks?

You ask, “Why do you need 2 inch sanding discs?”

I Purchased 2-Inch Multiple Grits Aluminum Oxide Wet/Dry Hook and Loop Sanding Discs with a 6mm Shank Backing Pad + Soft Sponge Buffering Pad, 5-pieces Each of 60, 240, 600, 1000, 5000, and 10000 Grits from Amazon a couple of years ago and they served me well.

A couple of years ago I purchased a drill powered (DISC SANDER) it came with a bunch of sanding pads …100 or more and I purchased extras. The sanding disk was pretty good but the sanding pads were garbage. Either the felt on the back of the sandpaper would give out prematurely or the sandpaper would clog up in minutes. You can see the Sandpaper Cleaner …just click on the link  …it was only 10 dollars and had everything you needed to get started using a small 2 inch sanding disk for wood turning. I was very happy with it even if the pads wore out quickly and that they were poorly marked. I would recommend it to anyone who wants a quick want to start sanding their bowls and other woodturnings.Make your own sanding discs with a diy 2" gasket/punch cutter

Jeteven 2 Inch Sanding Disc 100 PCS Mix Grit Sander Disc Grinding Discs for Drill Grinder

This system will give you a good idea on how to make your own 2″ sanding discs or how to use it more effectively or purchase something you might need to meet your specific needs. I did order a 100 piece set of sanding disks called “Jeteven 2 Inch Sanding Disc 100 PCS Mix Grit Sander Disc Grinding Discs for Drill Grinder”  these satisfied my needs for the moment at the time and I still have some left, they were marked for size (grit) but they had the same problem, backing did not last too long on some, lasted forever on others …same with the grit, some lasted a long time, some clogged up and with some cleaning lasted a little longer. It doesn’t matter what type of sandpaper you use, you should invest in a rubber cleaner for sandpaper like this one  on Amazon https://amzn.to/2OvSieN

SKATECO Belt and Disk Abrasive
Cleaning Stick (8-1/2″ 2-pack)

This is one of the best deals I have found for cleaning any type of sandpaper and getting a 2nd, 3rd or more life out of your disk sander, belt sanding …really, anything with a piece of sandpaper ….works like magic most of the time and you really need to get one….especially for these little 2″ sanding disks. It is like a big sandpaper eraser.

—Increases the life of sanding belts and disks by removing residue
—Works to clean dirt and grime off of grip tape
—Natural rubber material works to remove residue off of abrasive surfaces

Back to the 2″ Sanding Disk

Although this mandrel and sanding pad work great in a cordless drill or corded drill, I think I am going to try a air powered random  rotation 2″ orbital drill from Harbor Freight…..but that’ another story 🙂

Needed Some 2 Inch Sanding Pads

So one day, I needed some 80 grit sanding pads …I was all out. I grabbed a 6″ sanding disk from my orbital sander and cut a couple of 2″ sanding disks. To my surprise they worked perfectly and lasted 10x longer than the sanding disks that came with the kit and the extra disks I purchased.

Cutting 2 Inch Sanding Disks With Scissors 🙂

So, I’ve been cutting sandpaper circles by hand. It’s pretty rough on scissors. I wrecked a pair of awesome scissors, I tried sharpening them but they had some serrations and other shapes ….just couldn’t make them work like new.

Maybe Gasket Punches Would Work?

I looked up punches, gasket punches on Amazon and Google ….a 2″ punch cost anywhere from $150 to $200, unless there is a better search term I could not find anything cheaper. So, buying a punch wasn’t the answer. I think I will have to make my own 2 inch sandpaper punch.

After seeing the post in our woodturning facebook group from someone having the same problem I started looking around to see what I had that might work.

sandpaper cutter from 2" electrical conduit
Make your own 2 inch sandpaper cutter from a piece of 2 inch EMT or electrical conduit

I found some galvanized 2 inch water pipe, looked too thick to mess around with ….I thought I had some 2″ copper water pipe laying around but I couldn’t find any. I ended up digging up a piece of 2″ thin walled electrical conduit. The inside diameter was someplace around 2 1/8″ not sure exactly what it should be because it was a little beat up.

I cut off about 6″ of the 2″ EMT with a grinder, sawzall or hack saw would have worked. I took the piece to my grinder squared off the end I wanted to sharpen with the miter guage.

PICETURE OF SQUARING OFF IN GRINDER

The other end of the pipe was a factory edge so I had to pound out a ding to get it back to circular shape and I was good to go on that end.

I had about a 60 grit piece of sandpaper on my 12″ sander, set the miter guage as far as it could go and started to put a bevel on the edge of the side that I squared up. Once I got a good bevel on it I took it over to a smaller sanding disk with a 100 grit wheel and started putting a sharp edge on the bevel.

I had a nice edge but I then took it to a 150 grit belt sander and finished the edge ….nice and sharp now!


The inside of the pipe at the sharpened end had a nice big burr on the inside, I tried to file it down and ended up using a Dremel tool with a little sanding drum on it. I removed the burr perfectly and Cutting 2 inch sandpaper discs for sanding wood bowlsthe inside was nice and smooth. However, now there was a burr on the front….I resharpened, removed the burr from the inside and resharpened the outside again with a file and diamond hone.

Next I wanted to make a cap for the top of the conduit. Not necessary but I was having fun 🙂

I found about a 4 or 5 inch wide piece of ash and turned it to round. I hollowed out a small opening in the bottom, about 1″ deep and then I used my parting tool to create a recess for the pounding end of the pipe to slide into. It worked perfectly. I finished sanding and shaping it, I rounded off the top a little.

Last steps involved sticking the cap in the chuck and I sanded some more and applied some of Capn Eddie’s OB Shine Juice. I like using this fininsh on my tools, easy to repair or apply another coat if necessary but it protects the wood and takes a beating.

One more step….I epoxied the Ash Cap to the pounding end of the new 2 inch punch. I tapped it a couple of times with a big heavy wood mallet, keeping the cutting edge on a piece of wood. Looks like a thing of beauty ….if I had nothing better to do I would paint it and put it on the shelp to look at 🙂 ………but, it will be used a lot!

I tried cutting some 2″ pieces of sandpaper and it worked great, I thought it should cut better so I took the pipe over the my grinder and reshaped the cutting edge, gave it a double bevel …kind of like on a bowl gouge. I had to get rid of the burr again but this time it cut the sandpaper like butter.

In fact, I didn’t even have to use a maul or hammer on it. I just put my palm around the wooden top and twisted the cutting tool on the piece of sand paper and ended up with a perfect 2″ piece of sandpaper.

If you make one of these I imagine you are going to have to find out what the best cutting edge is for you and since it isn’t tool steel you will probably build a tool to cut your own 2" sanding discsdull the edge quickly. But, I’m sure you can get 12 or more sanding disks from one sharpening. ….either way, much better than using a pair of scissors 🙂

Using Your Sanding Disk Cutter

One final thing to remember. When pounding out your 2″ sanding disks make sure the sandpaper is on a piece of wood, 2×6 or some log cut off. Make sure the piece of wood is on something stable ….I”m not sure a work bench would be solid enough. Try putting on a concrete floor, concrete block…..I even cut out a few with the wood on my lathe rails …probably not the best way if you are going to be whacking it….but good enough if you are just hand twisting.

Good luck, let me know if you decide to make one?

Woodturning As Therapy!

Can Turning Wood Help
You Overcome A Bad Day

I was feeling a little low, problems with my garage/shop permit and problems with my health and switching of insurance agencies ….turns out that they lost me or deleted me from the system and now I have no health insurance!

So, thought I would share some thoughts that I shared with the facebook group …basically my way of dealing with stress and problems of this world. Sometimes you just can’t beat it and if you can stick a piece of steel into a turning piece of wood……for a short time your problems go away!

Sharing Some Woodturning Pictures

Thought I share some pics.

This is what I do when I want to turn, but just don’t have it in me to set up a bowl blank or some other more complicated woodturning project.

I turn tool handle blanks!

woodturning tool handle
Learn how to make your own woodturning tool handle for a carbide turning tool

I know, that probably sounds dumb, but its really easy to do, I’m turning something so I’m feeling a little usefull and I’m making shavings 🙂 I love making new woodturning tools so I’m always in need of some woodturning tool handles.

From Branches to Tool Handles

The trick is to cut up some fairly straight branches that are at least 24″ long and anywhere from 3 to 5″ wide. I try to use hardwood, but I use anything I can get my hands on. So at this point I have about 25 branches cut to around 24″ and I keep them outside. I probably should paint the ends but most of it is ash and oak which have been dead for a couple of years.

make a woodturning tool handle

I don’t know how many of you mow your own lawn, and those that do how many of you look at it as a pain in the ass or think of it as a time to empty your brain ….and just cut grass. That’s how it is for me to turn some handle blanks….. I suppose I could apply the some train of thought to bowl blanks, but handles are a lot easier.

Making Tool Handles for Woodturning Tools

I like making tools so the handles always get used. I give some away and I’m planning on selling some of them, carbide tools and HSS parting tools and scrapers for now. I hope 2018 to be the year that I set up a website and can sell a few tools per month, helping me, helping my fellow turners!

Clear My Head By Turning Tool Handles

But, to place a branch on the lathe and start turning is the fastest way for me to empty my brain, or just feel like I accomplished something for the day……it has all kinds of theraputic purposes! Its a lot healthier than taking some type of sedative or other mind altering drug, better than pounding down a bunch of beers. Sometimes I’ll go out to the shop when I can barely walk, I throw one of those limbs between centers, scrape off the bark, get down to the wood and see what God has designed for me today. No limb or branch has ever been the same and the beauty of wood is something that never, never ceases to impress me.

Turning a New Oak
Woodturning Tool Handle

Was feeling a little low today so I threw an oak limb on the lathe, between centers and created kind of a funky shape only because the bark went deep into the wood, doesn’t matter I might make 2 handles out of it, or one long one with a unique shape 🙂 I also practiced my skew skills a little, using both the flat skew and the oval skew…. didn’t do too bad, but I need some practice, I need to sharpen the skews….probably would have done a better job, but I didn’t feel like setting up the shapening jig.

If you’ve read this far….good on you! For the new people, I really don’t like showing too many pictures because a tree fell on my roof, been waiting for the insurance and county so I can get things started. I’m trying to put a 12/12 pitch on this thing ….back in the day I could do it by myself. Gonna be tough now. Plus just talked to the county and they changed their building code standards and this whole thing has become a bigger pain in the ass. I live in the most expensive county in Illinois, they have taken me to court a couple of times but the problems have always been their fault, now I have to redraw plans!

This is why there is boxes, wood, shavings and debris all over the place. I don’t have a roof over my head, just a bunch of tarps.

Sorry, I don’t mean to bring you guys down. We all have our problems, life sucks and if you don’t think that you haven’t l;ived long enough. Its how you deal with the sucky part that matters.

Check out the hunk of oak, that will be a beautiful handle some day.

Here’s a couple of pics to look at. Will try to post a video also

Make Your Own Parting Tool For Woodturning

How to Make a Parting Tool
From A Sawzall Blade

I really enjoy making my own woodturning tools, if for any reason, just to see if I can do it! So I thought I would make my own parting tool for woodturning.

I’ve made a couple of turning tools with carbide cutters, and some with HSS cutting blanks, all turned out to be very useful. It’s very rewarding for me to make my own tools…. although, there’s nothing like an expensive bowl gouge made with the best metal and sharpened properly.

I had a parting tool with my cheap set of chinese tools. It was about 1/4″ wide and works well, even if I have to sharpen it often. But I needed a thin parting tool for my woodturning projects and something that I could hold in my hand. I was looking for a parting tool with a 1/16″ to 1/8″ blade and found a couple out there costing anywhere between 20 and $30 dollars.

Sorby Parting Tool

Sorby makes a really nice parting tool and I probably would have purchased it if I didn’t get the urge to make my own parting tool. I remember watching a capt’n eddie video about making a parting tool http://www.woodturningbasics.com/make-your-own-parting-tool-diy-parting-tool-plans/ so I thought I would try it mysyelf.

DIY Parting Tool Marterials

I used an old Lennox Sawzall or Reciprocating Blade for the blade of my wood lathe parting tool. I must have throw a couple hundred of those away throughout my lifetime. My wife gives me a hard time about saving stuff, I think I thru a whole box of old blades away thinking I would never sharpen them or use them again….. never fails, as soon as you throw something away you figure out you need it!

Sorby thin parting tool
Double Angle Sorby Thin Parting Tool

I shaped the end of the blade like the Sorby Parting Tool, double angle look. I then cut the end of the blade off to square it off and I cut and ground down the teeth.

Next I took the blade over to the disk sander and ground it down to bare metal. I got it looking nice and shiney, looked pretty good. Since I’m not a metal guy, I was starting to impress myself 🙂

Making Handles For DIY Parting Tool

I cut some 1/2″ handle halves from some Catalpa Tree wood I had laying around that was pretty dry. The stuff is hard as nails. I then traced the location of the blade on each wood handle half. Then I took out a sharp chisel and chiseled out the traced area on both sides so the blade would sit in the chiseled out area and the wood halfs would meet together flush.

You want to chisel out the handle a little deeper than the blade thickness to allow for some epoxy to get between the blade and the wood handle on both sides. I think I used a 30 minute epoxy to glue the handles together. You can get 30 minute epoxy  …yep just click on that link or check out your local big box store.


Make sure you clamp up the handles nice and tight, wipe off any excess epoxy that oozes out from the handles being squeezed together. Its easier to clean it up now that after it gets hard.

Attaching Handles to Your
New Woodturning Parting Knife

I followed the steps above and then took the clamps off. It looked good and I probably could have gotten away without having to add rivets to the handles. But, I thought it would look cool with some brass riviets. You can buy special rivets from knife making suppliers, there are 3 different types, check out the video I put on at the bottom of the article on Make Your Own Parting Tool  at the end of the page.

I’ll talk a little more on rivets a little latter. First I wanted to talk about drilling the holes for the rivets. I used a 1/4″ brass rod, think I got it from Home Depot or Menards. So after I took off the clamps I laid out [3] 1/4″ holes to drill through the wood handle, through the metal blade and out the other wood handle half.

Like I mentioned before, I’m not a metal guy. Just learning this stuff 🙂

Drilling Holes In Your New Parting Tool

I guess that sawzall blade is hardened steel, so….. drilling through it was a real pain! I couldn’t start with a 1/4″ drill bit…it went through the wood but stopped dead when it hit the steel blade. I ended up starting with a 1/16″ drill bit and had to use cutting oil, had to use cutting oil with each size increase of the drill bit and it kinda trashed the wood handle!

So, if you’re gonna do this and you are really anal about what it looks like, you had better predrill the steel so you don’t mess up the wood handle. I know that’s what I’ll do next time.

Next I cut the brass rod about 3/16″ longer than the thickness of the handle. I put some epoxy on the brass pins and in the holes of the handle. Then I used the smallest hammer I could find to ping the brass rivets on both sides. I really needed a small ball peen hammer …never really knew what those things were used for …got a good idea now 🙂

I did pretty good, but got carried away and cracked the handle on both sides on different riviets!

You really don’t need to smush out the brass rivets that much because you’ll take the handle to a belt sander or a disk sander and sand down the handle and the soft brass rivets. So, that’s what I did. I just used the disc sander to round off the edges and flatten the flat of the handle. Then took it to my 1″ belt sander and further shaped it.

I took some 120 grit sandpaper and then 220 grit to it, got it nice and smoother and put a couple coats of clear shellac on it.

The only thing I had to play around with was the top and bottom angle in the front cutting edge of the parting tool. As I write this, I can’t remember what the angle was….will have to come back and let you know latter. I just keep trying until I found something that cuts well.

That’s about it.

My DIY Parting Tool doesn’t look like it came from a factory but from someone’s shop….my shop!

I can’t tell you how satisfying it is to make the tools. Not sure why. I have designed and built multimillion houses, strip malls, factories and some pretty big and expensive room additions ….I get more satisfaction out of making one of these tools that actually works than any of those big projects.

Here’s a quick video I did …just made of some still pics with my narration, I think its about a minute or so but will give you an idea of what and how I make my own parting tool 🙂

#Make A Parting Off Tool
#Carbide Parting Tool
#Lathe Parting Tool Setup
#Parting Off Tool
#Parting Tool
#Parting Tool Holder
#Parting Tool Lathe
#Parting Tool Sharpening
#Parting Tool Wood Lathe
#Sandvik Parting Tool
#Thin Parting Tool
#Using A Parting Tool
#Woodturning Parting Tool

Make Your Own Beading and Parting Tool

I Really Enjoy Making
My Own Woodturning Tools

I love turning wood and I almost enjoy making woodturning tools just as much! So, when I find a unique method of making tools or new supplies and suppliers that you can use to make cheap and effective woodturning tools I’m gonna let ya know about it!

Learned How To Use Square Cutting
Tool Bits To Make Woodturning Tools

After watching a video from Mike Peace on Making and Using Beading and Parting Tools, I ordered 4 HSS Square Cutting Tool Bits Bar 8mm x 8mm x 200mm, that would be about 5/16″ x 7 7/8″ ….I paid around 11 dollars for 4 of these, you can find them here HSS Cutting Bits.

Make Your Own Beading and Parting Tool
Make Your Own Beading and Parting Tool from 8mm HSS tool blank

Ordered Some Square Cutting Tool
Bits To Make A Wide Parting Tool

Then, I started thinking that I would like to try making a bigger tool, so I also ordered the 12mm x 12mm x 200mm bar, could only find one bar for around $9 dollars. I thought with this larger size I could make a bigger scraper or maybe a gouge of sorts. 12mm is almost 1/2″ and I wanted to try and make a modified bowl gouge.

Instead of trying to convert or grind down an old chisel, file or drill bit these hardened steel tool blanks might make excellent substitutes and are ready to go, just grind your profile and sharpen. I’m excited to give these a try, I’ve made carbide tipped tools but never have used these tool blanks for making woodturning tools…. will let you know how it goes 🙂

Turn a Wood Handle and
You Have A New Parting Tool!

Turn a tool handle, epoxy the handle and metal bar together and you’ve got yourself a new tool!

I really liked the chisel/scraper that Mike did in his video. I could use a wide beading/parting tool like the one he made. I have some handle blanks, all I need is for the square cutting tool bits to get here.

Check out Mike Peace’s video on Beading and Parting tools! He even goes over how he makes a small handle for the diy parting tool!

Don’t forget to check out my post on how I made a thin parting tool from a sawzall blade, click on make your own parting tool!

How To Make Your Own Parting Tool

How To Make A Lathe Parting Tool, How To Make A Parting Off Tool, How To Make A Parting Tool, How To Make A Wood Lathe Parting Tool, Make A Lathe Parting Tool, Make A Parting Off Tool, Make A Parting Tool, Make A Thin Parting Tool

Make Your Own WoodTurning Tools

How to Make Your
Own Woodturning Tools

What does a broken 1/2″ drill bit, a cold chisel, a 1/2 x 1/2″ pc of steel from home depot, a 1/2″ pc of round bar from home depot and carbide cutting bits (carbide inserts) have in common?

Well, properly shaped and machined …then add a nice wood handle and you have all the tools you need to turn just about anything. On top of that once you figure out how to use these materials to make your own turning tools you have the basis to make just about any type of turning tool you might need.

Al Furtado Shows You How to
Make Your Own Woodturning Tools
make your own carbide insert woodturing tools
All makes simple carbide insert woodturing tools.
grind a cold steel chisel for bowl gouge
Monster bowl gouge from an old cold steel chisel!

My Desire to Buy Every
Woodturning Tool Available!

For me, its easy to get caught up in a Sorby tool catalog or just searching on Amazon or Ebay for woodturning tools and I get lost for hours ….thinking “man, I need 1/4″ bowl gouge, 3/8″ bowl gouge, 1/2″ bowl gouge, 5/8″ bowl gouge, 3/4″ bowl gouge and a 1″ bowl gouge all with a fingernail grind …..then I need that same set with a standard grind and I need the same sizes in a spindle gouge both standard and fingernail grind ….oh ya, I need a parting tool ….how about a couple of different sizes of parting tools. Yep, I need a full set of scrapers and then I need some of those skew gouges for perfect finishes I see the masters making, can’t forget a roughing gouge….I mean, 1/2″ 3/4″ 1″ and at least 1 1/2” maybe bigger….I need all these, right?

Woodturning Is Addictive

I know you know what I mean. This hobby of woodturning is more addictive than crack cocaine! You think more tools, the best tools will make you a better turner …maybe so, but who has the cash for all these pieces of hardware because we haven’t even started talking about the wood lathe you have and the woodlathe you want to get, not to mention all the wood lathe accessories you’re gonna need!

Make Your Own Woodturning Tools

Well, one of the things that really got me excited was making your own woodturning tools, that’s right you can be a DIY woodturning tool maker 🙂 I think there is actually a subculture out there of guys making their own tools out of anything from old screwdrivers, files to auto or truck leafsprings.

The problem for me is that I’m not a metal guy. I can draw a house, building or shoppoing center and I can build that same drawing doing everything myself …..but I never learned how to work with metal. The closest I ever came to working with metal was aluminum siding, electrical wire and rebar for concrete….. well, ok, nails for my nail guy and screws for the screw gun 🙂

Been Sick, No Money for Expensive Woodturning Tools

Truth is I’ve been very sick for quite a while. When you’re sick you can’t work, I hate sitting or laying around so by “The Grace of God” I discovered wooodturning. Not too physical. I could find a low cost wood lathe at Harbor Freight and I could also find a cheap set of Chinese turning tools at Harbor Freight. That’s how I started.

I read as much as I could online and watched a ton of youtube videos. I learned much from Cap’n Eddie and too many others to mention. So, I thought I would share some of my journey in these pages.

My Woodturning Tools Were Junk!

The one thing I quickly found out was that my turning tools were really bad. I hand sharpened them till I totally screwed them up. Then the first investment was a Oneway Wolverine Sharpening System. I learned to sharpen my turning tools properly starting at that point.

Next, once I figured my tools really were junk and I needed something better. I stumbled on some DIY woodturning tool makers.

That’s when I discovered the many different ways of making your own woodturning tools. In these pages I hope to bring some of these methods to you. Some I will have tried, others I will just pass along because I’m just too sick to try everything I see but plan on doing it or trying these DIY tool building methods soon, however, you need to know now how to make some of this stuff.

I finally did learn that I could regrind the cheap tools that I had into a more useful grind or simply something that actually worked.

Started Making My
Own Woodturning Tools

Since I did not have much money I figured I could buy a piece of 1/2 x 1/2″ steel and a piece of 3/8 x 3/8″ steel from online metals, I could get some carbide cutters for a couple bucks a piece and then figure out how to grind a small platform for the cutter, tap the steel to attach the carbide cutter and make a wooden handle. My first attempt turned out pretty good, in fact, its one of my go to tools when I’m working with a tricky piece of wood.

My CARBIDE Woodturning Tool
How to make your own carbide insert woodturning tool
My first homemade woodturning tool was a carbide insert turning tool taking both square and circle shaped carbide inserts and it cuts like a dream, great for the times you might be a little apprehensive about sticking that new bowl gouge into an irregular spinning piece of wood!

I made a square and circular carbide scraper using 5/8″ carbide square and circular cutters. You can find them online but you should make sure they are for cutting wood. The square cutters are fairly cheap and you can even get a 4 sided radius carbide cutters, they are a little less likely to grab, but grab they do!

I watched a guy called Travis on youtube make a set of carbide tipped woodturning tools and just copied him. They are pretty rough but they really work well.

Made A Parting Tool for Woodturning

I did make a 1/16″ parting tool from a reciprocating saw blade with a metal handle. That was fun, I learned a bunch and use the tool all the time. It’s very satisfying to make your own tools!

diy parting tool for woodturning
I made a very effective parting tool from a recirocating saw blade …expoxied between two pieces of wood. Works great for cutting and designing. I used brass rod for the rivets and pinged them to expand the brass….. solid as a rock 🙂

However…..

Didn’t Know Anything About Metal

Then I wanted to make a 1 1/2″ wide scraper so I picked up a piece of steel from home depot and ground down an edge on the steel, I didn’t have a handle yet but I wanted to try the tool out. It ended up burning the wood more than cutting, I tried different angles ….same thing, just wouldn’t cut. I was stumped, thought I would be cranking out all kinds of turning tools …but remember when I said I didn’t know anything about metal 🙂

Turns out there are a whole bunch of different types of steel. And then you have the hardening process, have to heat it in a special oven, air cool it or oil cool it, heat it again to get a temper ….I almost put an end to my woodturning tool making adventures!

Sorry, I got a little long winded talking about making your own woodturning tools ….only because I know you might like doing that type of thing and you might be in the same position I was in regarding not having enough cash to have all to good tools you’d really like to have!


Enter Al Furtado.

I’m not sure how long Al has been turning, but I know he really enjoys it and he enjoys sharing his projects and his tools!!! Al seems to be a frugal guy or maybe he’s just strapped for cash like a lot of us…..so, he makes do with what he has and he makes a lot of his own woodturning tools and accessories.

Al made a type of bowl gouge that is perfect for himself from a 1/2″ drill bit that was broken. He played around until he got the grind correct and now it is his “go to” tool when turning bowls. The big secret is the metal that the drill bit is made from, it is already hardened and when shapened it keeps a nice sharp edge for a long time. You don’t have to heat treat it.

Woodturning bowl gouge from an old 1/2" drill bit
Woodturning bowl gouge from an old 1/2″ drill bit
Make Your Own Bowl Gouge from Steel cold Chisel
Find your own shape for your custom bowl gouges
Profiles of custom made woodturning bowl gouges
DIY hollower with Home Depot Steel
Al makes his own hollowing tool with home depot steel and carbide insert cutter

Al takes a common sense approach to making woodturning tools that will save you a ton of money. In the video below he shows you some of his favorite tools and how he made them from either old, broken or leftover tools that are made with hadened steel and all you need to do is put an edge on the tool and make a handle for it.

The video quality isn’t the best but if the content doesn’t get your creative juices flowing …..then nothing will!

Enjoy

My shop made wood turning tools By Al Furtado

Al’s tools are not the prettiest, but they work and you can do exactly what he did. I can testify that the carbide cutters work like a dream and I look forward to making some gouges from old drill bits and cold chisels ….as far as that is concerned ….go down to Harbor Freight and get some of their tools and bits …they are all hardened steel and should work just as Al has show us.

Thanks Al !!!!

DIY Parting Tool Make Your Own Custom Parting Tool

How To Make A Parting Tool

I needed a thin parting tool and I needed it now!

Sure, you can buy a Parting Tool for $25 to $50 but there’s noting like making your own parting tool. It gave me a lot of satisfaction once I figured how to grind the right angle on the tool tip. I actually took my design from the Sorby Parting Tool. Although Sorby has a wide selection of parting tools to meet your needs I tried to make mine look similar to this Sorby 1/16″ Parting Tool.Sorby 1/16" Parting Tool

Description of DIY
Parting Tool Project

I feel like I’m writing a term paper here but let me give you a quick description of the project. I wanted a parting tool with a 1/8″ blade. The idea is to turn an old used sawzall blade into to tool, make a handle of wood and used some epoxy and brass rod for rivets or whatever they are called in knive handles. Shape it a little on the disk sander and fine tune the cutting tip. That’s it…. BA DA Bing BA DA Boom!

Starting On Parting Tool Project

I started off with a sawzall blade, I think it was 1 1/4″ wide and 12″ long. Unfortunately I did not take a picture of it before I cut it.

I took a 4″ thin grinding wheel and cut the shape on the end of the sawzall blade and then I cut the teeth off. It cut pretty easily, I’m not a metal guy…. in fact, what I know about metal I probably learned on youtube 🙂 I remember watching someone on a video make something like mine, so its not an original idea.

Something possessed me to purchase a 12″ disk sander a while back and I have used that thing for so many tasks I can’t believe I’ve lived all these years without one. You can sand just about anything, metal, wood, figerglas and fingers 🙂

Parting Tool Blade Almost Ready

Anyway I sanded the blade to clean it up and take off any remainine paint. Coolest thing, the piece of metal looked like it was just shipped from Amazon, all nice an shiney. I was pretty proud of myself right about then.

So at this point I have the profile in the front, teeth cut off and all polished up. I need to trim up the end that goes into the sawzall ….just square it off. I have it in a vice, ready to cut off in the pic below.

DIY Parting Tool
Using a sawzall blade for a parting tool blade, shaped and in a vice ready for more cutting

DIY Parting Tool Wood Handles

Next I plan to cut and prepare the handles for attachement to the parting tool blade. I had some mulberry that had been drying for a year or so, it is very, very hard and finishes very nice. Who would have thought. But I find myself looking for a kinds of different wood types and the stuff that would end up on the burn pile …..ends up on the wood lathe or gets squared off on the band saw to be used for different projects.

PICTURE OF bandsaw WITH HANDLE HALFS *********

So I ripped down a couple of pieces 3/8″ x 5″ to use for the parting tool handles. I wanted the handles to be wood on wood when glued together so I traced the blade on one handle and chiseled out the shape at the thickness of the blade. In other words the blade sat flush in that half of the handle. Before I forget, that a small 1/8 or 1/4″ chisel and cut some grooves into the other handle half…..the purpose is for the epoxy to have someplace to grab on the wood.


parting tool handle
Wood handles ready for epoxy

Gluing the Parting Tool Handles
and Blade Together

At this point I mixed up some 5 minute epoxy, spread the expoxy on both handle sides, placed the blade in the cut out space, put more epoxy on the top of the blade and then clamped the whole thing together. Instead of 5 minutes I let it stay clamped overnight 🙂

parting tool handle
Handle blanks, one is chiseled out to hold the sawzall blade and the other is chiseled out to hold some of the 5 minute epoxy
parting tool handle and blade
Setting sawzall blade into the 5 minute epoxy


parting tool wood handles
Clamping parting tool blade and wood handles with 5 minute eposy.

Next I needed to put a couple of rivets thru the wood and the blade. Since it is just a shop tool I could have used a 16 penny nail, but I ended up using 1/4″ brass rod. The idea is to make the pin about 1/8″ longer on each side and the “peen” the pin on both sides. This mushrooms out the pin on both sides and keeps it in place. Here’s what I did.

I took my parting tool with the handles glued to the blade with epoxy and then I drilled three holes thru the handle, 2 or which went thru the metal blade. I started with 1/8″ drill bit on a drill press and as soon as it hit the steel it started smoking and sputtering! I knew right then I screwed up.

Next time I will drill the hole thru the parting tool blade seperately and then thru the handles. I ended up breaking about 3 bits and had to use cutting oil which soaked into the wood but I did get the holes drilled 🙂

So….next I cut the 1/4″ brass rod a total of 1/4″ longer that the width of the handle. First I added some 5 minute epoxy to the hole before driving in the pin. I peened the pin on both sides until it started to mushroom over the handle. The I hit the last pin one too many times and got a small crack in the wood….just added some CA and saw dust as a crack filler to be sanded latter.

Shaping and Sanding Parting Tool Wood Handle

Since everything was square I went over to the  12″ monster disk sander and sanded both sides flush. This gets down to clean wood and it evens out the brass pins. Then I used the disk sander to round off the corners and the wood end of the parting tool. Took it over to the 1″ belt sander, cleaned up the blade a little more and fine tuned the wood edges.

Using My New Parting Tool

Being excited, I went to the wood lathe to try out the new parting tool. I was working on a handle for a gouge blade. It was about a 4″ ash tree trunk that had died from the beetles. As it was spinning I slowly entered into the wood and ………it moaned and groaned and burned!

Urgh, I was devastated! It cut like crap !!

After taking 5, I took a look at the Sorby parting tool that I was modeling I was modeling and noticed my angles were off. I reground both the top and bottom angle and tried it again. Voila! It cut like butter and ash is pretty hard.

Custom DIY Woodturning Parting Tool
Finished Parting Tool, 2 Wood Blanks for Handles, Hunk of Mullberry I cut the handle from and 1/4″ brass rod used for handle rivets

So if you try making one of these pay attention to the grind angles and pay attention to how you grind the angles. Try sharpening/grinding both angles remembering which one you did first, then try reversing the order. Then try sharpening only on side, try just touching the bottom up, and try just grinding the top angle.

Now I have mine set up so I just touch the grinding wheel on the bottom angle.

Want to see how the big boys sharpen their tools….. here’s one big boy, Sam Agelo….. I have learned a lot from him and he sharpens his thin parting tools on a belt sander ….you could also use a disk sander. He doesn’t use a grinder because he has CBN wheels on them and he was afraid the thin parting tool would ruin them….. very expensive, anyway check out his sharpening technique for parting tools.

REMEMBER always use a platform when sharpening on a grinding wheel, take your life into your own hands if you try to free hand!!

If you’re interested here’s a really good video on all the different methods of pinning that knife makers use. I might even invest in a special rivet for making knife and tool handles called a “Cutlery Rivet” they are in 2 pieces and on slides into the other and expands as it does. Pretty much a no brainer.

Turning Handles for Your WoodTurning Tools

Turning Handles for Your WoodTurning Tools

I know you want to see how to make your own woodturning handles but first I need to rant!

Well, my garage roof still isn’t on, first problems with the insurance….never use State Farm, next is problems with the county for the building permit. Seems as though you need more detail and info these days and if you are in a flood plain….. you are screwed…. I’m in a flood plain ….looks like I am getting screwed!

Woodturning Handle Videos

I still work in my garage/shop but its a mess and I’m pretty embarassed the way it looks. So, I don’t shoot too many videos from my shop, although I wanted to do a video on making your own woodturning handle. Maybe I will until then, watch these videos on how to make your own woodturning handles from a piece of scrap wood, or your favorite wood on your own lathe with a little glue and ingenuity.

Metal for Making Your
Own WoodTurning Tools

Most woodturners make their own scrapers, skews and parting tools. If you don’t have the metal to do that, consider Online Metals…. I found them to be very helpful, fast and affordable.

Anyway, in my journey of learning woodturning I have stumbled upon guys making their own tools. Even if I had more money than I could spend I still would like to make my own tools!Make your own handles for your wood turing tools

I don’t have more money than I can spend, in fact, sickness has left me pretty destitute…. that is broke. So I pay attention when someone shows me how to build efficient and effective tools for cheap.

Cap’n Eddie Shows Us How to Turn
Our Own WoodTurning Tool Handles

Cap’n Eddie is one of the guys I have learned so much from over the last year. How to build carbide tools, how to make scrapers, how to make a handfull of different jigs that would cost hundreds if not thousands of dollars.

Help Out Captain Eddie…Buy His WoodTurning Supplies and Tools

You might already know that Cap’n Eddie had some health problems, a brain tumor I believe and it seemed as though he was coming back quickly, but recently it looks like the poor boy is having a tough time. I can emphathize with him because I’ve been sick so long myself. Good health is something you never appreciate until you become sick and can’t do what you have all your life….it’s a terrible thing. But Cap’n Eddie seems like a fighter …he keeps pluging along ….so buy his stuff if you can and more importantly pray and ask the Lord to heal him and let Eddie teach us for a few more years!

Visit his site at: www.eddiecastelin.com

Anyway…. if you need some carbide cutters and some of the other tools he sells I would ask you to visit his site and buy stuff from him…. let’s help the guy out …he has given so much to the woodturning commnity especially on youtube.

Make your own wood turning tools Below you will find 2 videos on how to turn a handle for the tools you make. Both videos will give you some great tips and ideas so that you can make your own. These are 5 years or more old, the video quality is not that good but you can still get the idea and learn from Eddie how he does things.

Check how to build handles for your woodturing tools.

I found a great article on building handles, if you are going to make your own woodturning handles you would be wise to check out Learn How To Make Your Own Handles for Wood Turning Tools http://woodturninglearn.net/articles/forgottenhandle.htm

And one more quick video on how to make a handle for your woodturning tools.

I’m going to have to do another post on making handles for your woodturning tools. There are many methods to consider and you might want to take a piece from all these methods and create your own woodturning handle. Until then, you have enough information on how to make a woodturning handle!

More On Making Woodturning Handles

I watched another tutorial on how to make woodturning handles and was blown away. I had to include it today instead of another post. Watch this video all the way thru and then check out the notes below. I know you’ll pick up some awesome tips and design ideas for your tools. I really enjoy this teaching from The Sonoran Woodshop

Here are some comments and important links he mentions from the tutorial. This guy has done great camera work, great woodturning handle design and construction.

At this point I had enought info to scrap together some scrapers first, and you can bet they will have some awesome handles. Maybe I’ll do a video of my maiden attemp at turning and fittng my first handle …..should be a learning experience for us all!

Here’s some useful links from his handle turning video description:

A great way to save a few dollars on your next turning tool purchase is to buy your tools un-handled and make your own. I came up with a design that works really well. It includes set screws which allow you to remove the tool from the handle if needed.

PARTS:
Ferrule: I use 1″ copper pipe (which is the inside diameter) for all of my turning tools. The only exception is my Spindle Roughing Gouge (SRG) which uses 1-1/8″ copper pipe.
Set Screws: I use 5/16-24 set screws for all of my tool handles. The lengths vary based on the tool handle wall thickness.

TOOLS WITHOUT HANDLES:
Please keep in mind I have no affiliation with any of these companies. I posted the tool steel used by each company for reference, but the reality is that they are essentially the same.

I currently use Thompson Lathe Tools. They use CPM10V (A-11) a powder metal tool steel.

http://thompsonlathetools.com

Peachtree Woodworking Supply sells Robert Sorby unhandled tools. They use M2 tool steel.

http://www.ptreeusa.com/turning_tools…

Carter and Son sells unhanded tools. They use M42 tool steel.

http://carterandsontoolworks.com

D-Way Tools also sells unhanded tools. They use M42 tool steel.

http://d-waytools.com


I thought it important to add some of the comments from his video on turning wood handles for your woodturning tools. Some great comments along with good ideas.

I’m a beginner turner, about a year or so. Been a carpenter/contractor/architect all my life and I can build just about anything. I know wood inside and out…. but steel is new to me. I appreciate your list of tool providers along with the type of steel they use. Is there anyway you could rate either the provider or the steel type. I want to purchase some good tools, tired of the chinese …although they got me started. I figure if you can turn something with a chinese tool you should be able to make some great progress with good tools. I was looking at D-way, not familiar with Thompson. Would really appreciate a lesson in quality suppliers and what type of steel would be the best, second best and so on. Subscribed to your channel…. looking forward to seeing what you do. Thanks Scott

1

The Sonoran Woodshop

I think tool steal is one of those things that if you ask 10 different turners you’ll get 11 different answers. I bought tools from each of the companies listed in the description and they all seem to perform the same. You really can’t go wrong with any of them. I have all Thompson for a couple of reasons. 1) they have a large selection compared to the other companies. 2) the length of their tools are longer so you get more steal for the same price as the other tools (check out this link and you’ll see what I’m talking about) https://www.instagram.com/p/BN5GvSthcwC/?taken-by=scottseganti&hl=en

Carl Jacobson

Man great job on the video!! I shared it on my website too!

2

The Sonoran Woodshop

Thanks Carl… very much appreciated!

The Wood Whisperer

Awesome video dude! Nice explanations and great visuals. Can’t wait to see the next one!

2

The Sonoran Woodshop

Thanks Marc… much appreciated!

Brian Sinclair

Great video. One new subscriber.

1

Jack Maravola

Very nice. Thank you for sharing your technique Scott….!

1

Bklyn James

Oh Yeah, please more videos.

1

Bklyn James

Impressive… Very Impressive. On point with the whole process, and left me with no questions. You nailed it.

1

The Sonoran Woodshop

Thank you for the kind words and feedback.

Mike Porter

Your approach to making videos produces a fine product. As to the content of this one, I don’t have the tapping tool or the pipe cutter or the router table, however if I was to do several handles it would be worthwhile to buy them. One advantage of your design is that the tool can be removed for sharpening which I favor. Have you taken the tool out many times? I wonder how the threading on the pipe wall or the wood holds up to frequent removal and reinsertion of the tool tang. I’m guessing you leave the handle on for your sharpening. Thanks again for a helpful video.

1

The Sonoran Woodshop

Thanks for you comments Mike. It’s rare for me to remove the tool from the handle, but I do like having the flexibility. Handles with set screws are popular for people who need to travel with their tools. Students taking a turning class or instructors teaching may want to bring their own tools, so removing the tool makes it easier to pack. Another benefit is that eventually we make enough trips to the grinding wheel that the tool steal will need to be replaced, so you can save a few dollars by not buying or remaking another handle. As far as the threads holding up with repeated use… I haven’t had any give out yet. I’ve only tapped soft maple so I can’t speak about how other wood species will hold up, but as long as it’s a hardwood… I’m sure it would be fine. I have been extremely impressed in how well tapping wood works.

Jeffrey M. Myers

When can I buy this On Amazon! Great job Scott

1

SkunkTreeCarvings

ya…im going to like your channel.

1

Don Zeno

Great video. Keep ’em coming.

1

Apoph1s

Nice video. Great instructional detail. Where do you get your handle-less tools?

1

The Sonoran Woodshop

Please keep in mind I have no affiliation with any of these companies. I posted the tool steel used by each company for reference, but the reality is that they are essentially the same. I currently use Thompson Lathe Tools. They use CPM10V (A-11) a powder metal tool steel. http://thompsonlathetools.com Peachtree Woodworking Supply sells Robert Sorby unhandled tools. They use M2 tool steel. http://www.ptreeusa.com/turning_tools_unhandled.htm Carter and Son sells unhanded tools. They use M42 tool steel. http://carterandsontoolworks.com D-Way Tools also sells unhanded tools. They use M42 tool steel. http://d-waytools.com

Sandra Jacobson

Nice video! Easy to understand. Looking forward to more of your work.

1

RickTurns

One of the best handle-making videos I’ve seen!

1

Janet Brien

Perfection! Thank you!

Steve Brien

Perfect video, super clear and concise instructions, very well paced and shot. I’ve considered using set screws like this and you’ve confirmed that it’s a great feature. Thanks for sharing your knowledge.

DRMNZ

Nice work with great attention to detail. Thanks.

1

1

Richard Chellette

Awesome video. I made some tool handles myself, but I like how you made the optional to remove or change the tools.

1

Scrap wood City

Nice handle. Making the handles makes them pretty unique!

1

Joe Pieczynski

Hi Scott. I just stumbled across you channel. Nice work. I enjoyed the video. How about a few constructive suggestions. Make yourself a hardwood or aluminum blank about the size of your tool tang ( the rectangular feature in your handle blank ). Lock it in a vice and slide your new handle onto it when you drill the set screw holes. It will help with the orientation of the holes and keep the spin factor out of the equation. A thicker copper collar would also give you more metal based thread. I invite you to check out my channel if you have a minute. Take care, watch those fingers and keep up the good work.

1

The Sonoran Woodshop

Thanks for your feedback Joe. Constructive suggestions are always welcomed and appreciated. If I’m understanding what you’re saying correctly, there really isn’t a “spin factor’ that you have to contend with here… it’s more about the drill bit sliding off your mark when you start drilling. Clamping the handle in a vise as you suggested would certainly free up a hand, which could help keep the bit on its mark. As far as using a thicker copper ferrule… there really isn’t a need. The main threads are in the wood which is the intent. I have used this method on other projects… you will be extremely surprised at how well taping wood works… at least in hardwoods.

Joe Pieczynski

Hey Scott. Thanks for the reply. My suggestion was not to put the handle in the vise, but a piece of aluminum or hardwood the same size as the rectangular pocket in your handle where the tool would go. Then slide your handle onto that and drill away. You would have parallel, level and rotational all at the same time. It would probably work better if you had a bunch of parts and wanted them all the same. Forgive me, I always think of fixtures first. Nice result you got. thumbs up on this one. Take care.

1

David Walser

Thank you for the video. Your presentation was clear and the camera work was well done. I’ve always glued my tools into wooden tool handles. I’ll have to give using set screws a try.

1

Louie Cypher

nice work thanks for sharing, more videos please 🙂

1

1

Jim Sollows

I enjoyed the video! Very clear, nice voice over explaining the process. I am currious to know what finish you put on the handle? I look forward to seeing more videos from you!

1

The Sonoran Woodshop

Thanks Jim for your comment. I sanded the handle up to 220 grit and applied a tung oil finish. I prefer using a pure oil finish on my handles.

1

Joseph Muench

Sweet handle design. Thanks for sharing! Great video! 👌🏼

1

Harris Dendromiris

I really enjoy your video pal, since I prefer to make my own handles for my tools and chisels, you give me couple good tips about chisel handles,so go make some more useful videos like this, cheers

1

Samuel Smith

Outstanding attention to detail! Never saw set screws on turning tools.

1

The Sonoran Woodshop

Thanks Samuel for the comment. I have a few aftermarket metal handles with setscrews. I like having the setscrews and the ability to remove the tool from the handle, but I’m not a fan of how those tools feel in my hand. I’ve drilled and tapped wood in the past with great success, so brought that idea into my handles and it’s worked great. I’ve been overly surprised on how well it works. I haven’t seen anyone else do this either.

Ryan Grondin

Nice Video!! Thanks for sharing!

1

Claire Stolee

What suggestions do you have for selecting the wood for the handles?

1

The Sonoran Woodshop

There are lots of different woods you can use which vary depending on the part of the world you live in and what you have access to. I prefer closed grain woods (just a personal preference) and use soft maple for all of my handles. Ash is probably the most popular wood used… I’m just not a fan of the open grain. You do want to use a ‘hardwood’ (maple, walnut, ash, hickory, etc.) and stay away from the ‘softwoods’ (fir, pine, cider, redwood, etc.) The most important thing look for when selecting a piece of hardwood is to have straight grain…. especially on the end where the tool enters the handle.

1

Wood Frontier

Nice work. It’s great to see more people making woodturning videos. Looking forward to seeing more. I’ve got to make a couple handles as well. -Todd

1

Randy Price

Great quality tool as well as video. very professional looking video, looking forward to more.

1

Handles For Woodturning Tools, Handles For Lathe Tools, Turning Handles For Lathe Tools, Turning Handles For Woodturning Tools

Wood Lathe Tool Handles, Making Wood Lathe Tool Handles, Wood Turning Lathe Tool Handle, Best Wood For Lathe Tool Handles, Best Wood For Lathe Tool Handles, Best Wood For Lathe Tool Handles, Making Wood Lathe Tool Handles, Wood Turning Lathe Tool Handle

Make Your Own Parting Tool DIY Parting Tool Plans

Make Your Own 1/8″ Parting Tool

So…I’m turning a bowl but I screwed up and need a thin parting tool, that would be a tool that is kind of like a knife to slice thru your turning project to release it from a glue block or tenon.

thin wood turning parting tool
One possible end profile of your own parting tool, this a pic of a Sorby Parting tool

All I have is this big honker 1/4″ parting tool, I think its actually closer to 3/16″ wide. Well, I had to make it work so I did by changing the profile of the project…. I didn’t really want to do that but I didn’t want it to spin off into 100 pieces either.

DIY Parting Tool From Sawzall Blade

I’ve been wanting a thin parting tool for a long time. A think 1/8″ parting tool is a must for every wood turner not only for releasing or cutting thru your project but for adding detail, nice clean lines to a wood turning. So, I guess I need to get one.

Rober Sorby Parting Tool
You can easily make your parting tool to look like this using nothing but an old reciprical saw blade

But… I remembered Cap’n Eddie did a video on how to make one….then of course there are a handful of videos on how to make a parting tool for your wood turnings.

Eddie’s first video on making a parting tool was to start off by using a lawn edger blade and reshaping it with a grinder, then he did a second video on using sawzall blades, or reciprocal saw blades. Being a contractor I just happen to have a box of old blades I can use for making my parting tool.

Sharpening Your Wood Tuner’s Parting Tool

how to sharpen a wood turning parting tool
Quick look at how to sharpen a wood turner’s parting tool

I won’t go into sharpening very much at this point except to say that you need to keep your parting tool sharp for best results. There are some very important parts of your parting tool to keep an edge on so it can cut effectively. I will post more on this latter, but for watch what Cap’n Eddie does to keep his parting tool sharp and good to go.

Make My Own Wood Turner’s Parting Tool

Yes, I am going to make one…. I have more time than money so maybe I’ll do a video on that. In the meanwhile, why don’t you watch Cap’n Eddie put his parting tools together. The first video he uses the edger blade…that would be for you if you don’t have a source of thin strong metal laying around, the second is from using the reciprocal demolition blade ….usually a 12″ blade, and the third is how he sharpens his parting tool.

Make Your Own
Wood Turning Parting Tool

Make Your Own Thin Blade
Wood Turning Parting Tool

How to Sharpen Your Woodturning Parting Tool

See more wood turner’s tools.

How to Make Your Own Carbide Tipped Lathe Tools

How to Make Your Own Carbide Tipped Lathe Tools

To begin with, if your were searching for wood turning tools with carbide tips you might have a hard time finding them because these special tools are made with carbide inserts. Usually a piece of 1/2″ steel, round or square, notched out in the end to accept a small square, round or triangular carbide cutter that is screwed onto the steel shaft and the far side of the shaft has a long wood handle!

Rockler Carbide Insert for wood turning tools
Typical Carbide insert about 1/2″ x 1/2″ from Rockler

OK…. now, I’ll tell my short story.

In another time, when money was falling out of my pockets I probably would not have thought about building things for my own use. I wouldn’t have thought about being self sufficient, and I certainly would not have thought about trying to save a few bucks by making my own tools!

Turns out that being sick for the last 15 years or so has left me penniless, we have a house, we have food and we have each other. I told someone the other day, I have lived life with an abundance of money and have experienced complete destitute, no money, no food, sick and no doctors willing to help you get better.

Although I’ve always been goal oriented and always wanted to make more money so we might have a nice retirement and pay for the needs of our children, I had almost gotten there….. if fact I was there. Turned out I was lied to, had a partner who stole from me and in times where no man left behind means integrity to those we serve with, this guy (my partner) did everything he could to make all the liability to land on me.

Enough said about that. I’m sure we all have our sad stories…. not even sure why I wrote that stuff ….must be old age 🙂

Just let it be said that although money should not be the focus of your life, having money gotten thru smart hard work can provide a lifestyle that few know. That’s how I lived my life, I found that those who I thought were friends really were not friends, After I lost about 3 million dollars and was left destitute with 3 young kids and a wife I ran into a guy by the name of Dan O’neil. Just met the guy, we knew nothing about each other but he donated his time to help me put together a house from a pile of ruins ….I will forever be indebted to him! I was able to start over.

I’m not sure why I shared that, maybe you’re down on your luck ….have no money and want to start playing around turning projects on a lathe and just don’t have the cash to buy expensive tools….. well, hang tight because I want to show you how you might be able to make your own carbide woodturning tools.

Most WoodTurners Start Off with A Cheap Set of Woodturning Chisels and Gouges

So….I really wanted to say its better to have money than not have money.

But when you find yourself in a position to move forward in your life or project, you need to grab the bull by the horns, learn some new things, experiment and give it a shot.

In this case we are looking at chisels and gouges for turning wood on a wood lathe.

How Do I Get Good Woodturning
Chisels and Gouges Without It
Costing Me A Small Fortune!

You can go out and buy a cheap set of lathe knives, but you’ll get what you pay for…..garbage. Cheap woodturning tools are good for one thing that I can say from experience. You can learn how to properly sharpen a woodturning gouge or chisel and not fear that you are going to ruin your 100 dollar wood-lathe gouge!

However these cheap chisel and gouge sets can serve a purpose, you can learn how to sharpen these tools by using other specialized sharpening jibs, some free, some $150 or so. You can wreck the whole set by free handing the sharpening, grinding the chisel down to the wood handle 🙂

Woodturning is one of those hobbies that might look like it would be pretty easy and cheap to get into and get started. Like I said you can get cheap chisels, but they won’t perform well or last long. The steel is cheap, soft and won’t hold an edge. Or you could spend over 100 bucks a gouge to discover the difference. This approach has one problem, if its one of your first gouges you will probably ruin it at some point, whether the sharpening or thru misuse. Check out my post on where to buy woodturning tools and equipment. So, my advice would be to start with a cheap set of tools and then buy the more expensive tools on a one by one basis, learning the ins and outs of that tool.

Or….

How to Get a Good Set of WoodTurning
Tools For Little Money

You could try building your own wood lathe tools.

Are you handy, do you have basic wood turning and woodworking skills, do you have some knowledge of steel and how to work with it?

Recently a set of tools has entered the market that looks like a standard wood lathe chisel or gouge, but in reality it simply has a carbide insert cutter screwed into the end of a length of steel. You can go to www.rockler.com and read some of the reviews of woodturners who purchased these carbide tipped tools already made …..they say they wish that they would have started out with a tool that had a carbide insert!

This guy left a review on Rockler for Full Size Carbide Turning Tool

I’m hooked
I don’t know that I will every purchase another “fixed blade” turning tool again. I wish I had tried these before I invested in my expensive sharpening system.

Who wants to spend time sharpening when there is wood to be turned ! buy one.

It’s been said these are great for newbies because they are unforgiving, you have to beat on the thing to destroy it. These tools look just like a standard gouge except the end accepts a square, round, or diamond shape carbide wood cutter screwed to the metal shaft. They stay sharp much longer than standard tools, they come in a variety of widths, they can be resharpened….or just purchase a new tip for 5 to 10 dollars.

Rockler has several styles and sizes of carbide turning tools, check out the video for Full Size Round Ergonomic Carbide Turning Tool Item # 48723

Rockler's full sized carbide insert woodturing tools

These actually look like fun and I’m thinking of creating a set for myself, if it works out good I might get set up for 20 to 30 custom carbide insert tools per month. You can check out the prices online, almost all run around $100 to $150 per tool. Remember, no sharpening. They last 7 times longer and they are newbie friendly.

So I thought I would get some materials and create some tools that make it easier to turn wood, easier to gouge out the interior of a bowl, cup or vase and would even get some of the pro’s to check them out.

So, if money is tight but you have a lathe and you want to start to understand the difference between cheap Chinese tools made with inferior steel and a bowl gouge that has a carbide insert cutter ……well, you can make one yourself. Or if I’m successful in my project, you might be able to get one from me. I’ll probably just start of with a couple of sets and sell them on ebay. Have you checked out ebay for Carbide Wood Lathe Tools?

Carbide Insert Woodturning Tool
Easy Wood Tools Pro Easy Rougher Carbide Lathe Turning Tool 3200 New

When I was researching lathes, tools, jaws, chisels, gouges, and all the other necessary wood turning accessories it became overwhelming!

Don’t let that stop you. If you are brand new and money is tight check Harbor Freight’s wood lathe, if you have a few more bucks look at Laguna’s Revo 18|36 Wood Lathe or Nova’s ….even Jet makes a decent one.

Then you just have to do the research on what tools to use while turning a project. Most of the time we start with cheap stuff and end up being disappointed while swearing up and down because of catches and broken steel shafts. Building your own carbide tipped lathe tools will bring much satisfaction, fast and clean cutting ….not to worry about sharpening because you can just get a new carbide insert for 5 to 10 bucks.

Researching Carbide Insert
Woodturning Tools

Hope this info has been of help, I know I spent countless hours reading reviews, books and watching YouTube videos just to try and find out what the best way to get started would be. For me the order goes like this:

1.start with a cheap lathe
2.need faceplate or chuck for securing wood blank to the lathe
3.get a cheap set of gouges and chisels if you’ve never turned wood before.
4.watch some how to videos on YouTube to get you started.
5.those cheap tools will dull out fast, so you will need a sharpening system (try Oneway Wolverine Grinding Jig), invest in a good one because it will work on expensive as well as cheap stuff…… but you can practice your grinds on the cheap stuff until you get it right.

I started all this because I wanted to talk about making your own carbide tipped lathe tools, and as usual I get excited and go down the first rabbit trail I come to…..I apologize for that!

By the end of this week I should have all my materials needed to make a gouge with a:
1.circulate carbide cutter
-2 cutter sizes, 1/2 and 5/8 inch with a 30 degree angle of cutting

2.steel rod for all tools mentioned, I think I got:
-(1) 4′ piece of 5/8 steel
-(1) 4′ piece of 1/2″ steel
-(1) 4′ piece of 3/8″ steel

3. carbide insert cutters
-10 pcs 15mm square cutters
-10 pcs 14mm square cutters
-10 pcs 12mm square cutters
-10 pcs 5/8″ circle cutters
-10 pcs 1/2″ circle cutters

I won’t start until I get all the materials and caught up on a few projects, when I do, I’ll post a video and if they turn out pretty good ….put them up for sale maybe eBay although I just might set up a full eCommerce store for wood turning tools and jigs.

I’m not metal guy, I can design/draw and build any house, commercial building/ but I never learned about how to work with metal for projects we are discussing. So, this is all new to me. Wish I had a small metal lathe, but then again, I’d have to spend more time learning how the thing works.

Although I still draw a few plans, I mostly design and build websites for local marketers, people with brick and mortar stores who want an online presence. Consequently I spend probably 50% of my time each month learning what is new with design, social marketing, email marketing, online marketing apps and the list goes on because it is always changing.

I love messing around with my lathe and wood turning projects because I can focus on one thing, learn a new trade and enjoy the peaceful time it takes. I’m always learning and hope to continue my different quests until the end….live life and love it fully!

I will start a whole category in this blog on how to save money by making your own tools and jigs. I sincerely hope you find it helpful and hit the like buttons or whatever is the button of the day ….really, if you could just share an interesting post with your followers I would appreciate it.

I ran into this guy a while back, his YouTube channel is “your home workshop“, a young guy (by my standards) just sharing on how he decided to create a few wood turning tools on his own. It really inspired me since I don’t work that much with metal/steel, this guy whipped up a handful of turning tools in no time.

Check out his video on: How to Make Your Own Carbide Tipped Lathe Tools …click on the image!

Make your own carbide wood turning tools